Stream Configuration
- 23 Feb 2024
- 2 Minutes to read
-
Print
-
DarkLight
-
PDF
Stream Configuration
- Updated on 23 Feb 2024
- 2 Minutes to read
-
Print
-
DarkLight
-
PDF
Article Summary
Share feedback
Thanks for sharing your feedback!
Description
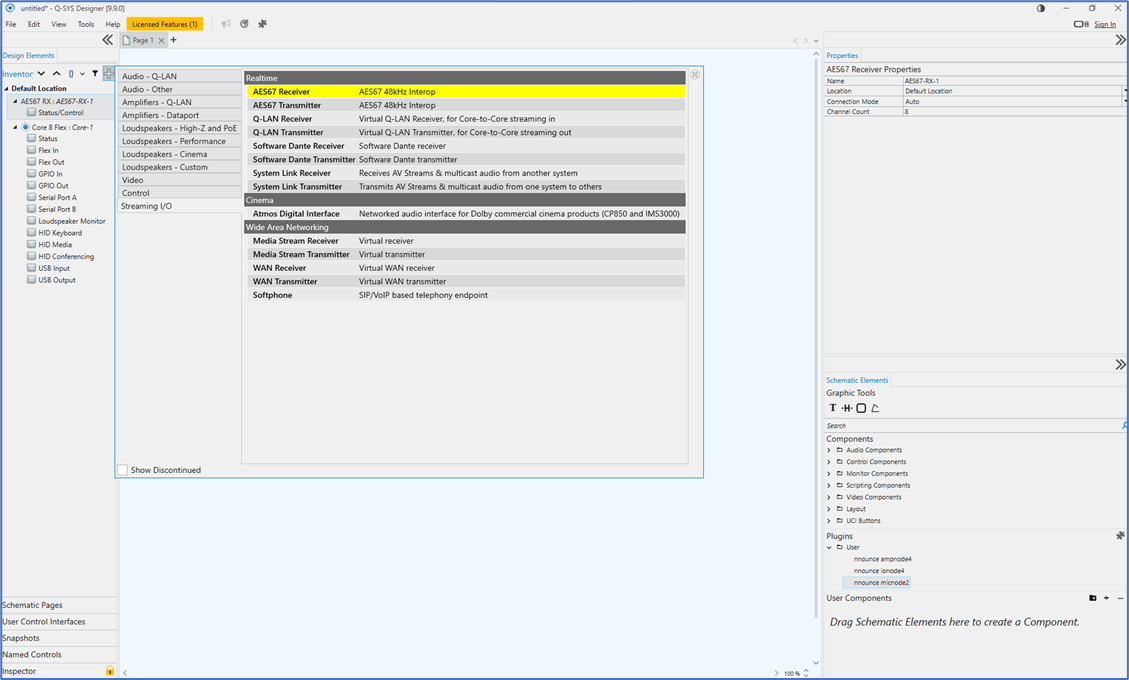
Create an AES67 stream in the Q-SYS designer. Select first the component and then configure it in the micnode2 plugin.
- Add the stream component to your Q-SYS design:
- Set up stream properties:
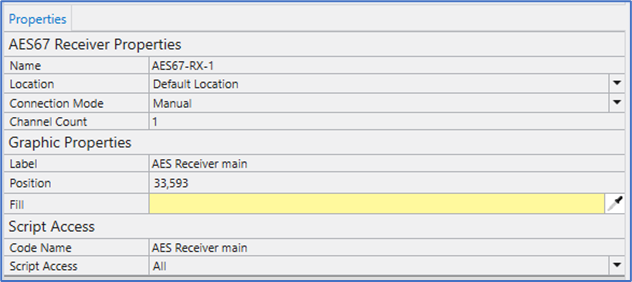 IMPORTANT: Streams need to have Script access set to the value Script. In older Q-SYS designer versions Script access is not visible in Stream properties. Rename the stream in a disconnected design. Only after that the stream is visible in the micnode2 plugin.
 - Once the Stream component is set up, switch to the micnode2 plugin and configure the Streams Configuration section.
Based on the chosen Configuration Mode Basic or Advanced in mic station Properties, the values are either prefilled in or you can set up the values manually. Basic mode has a default design and preset ports, in the Advanced mode you create your own design and set manually your stream configuration.
Option: Basic Mode
1. The multicast address is filled in automatically. In the Basic mode the Pattern is the IPv4 first and second byte and the last number is your micnode2 Unit ID.
IMPORTANT: Unit ID is a number you have assigned to your device in the Properties section. It is important to assign a unique number, we recommend ascending numbering of your microphone stations.
NOTE: This field is editable but prefilled, changes are visible in the stream IP address fields.
2. Select your streams from the dropdown.
IMPORTANT: The stream name needs to include TX for transmitter streams and RX for receiver streams.
3. Confirm your configuration with the Submit button.
NOTE: The field below the Submit button will show the progress.
The nnounce configuration UI takes over the information from Q-SYS. In the Basic mode the default design is used in the DSP designer. Manual changes by the user are overwritten with the default design after reconnecting to the WebSocket. The Network Streams section shows the streams as configured in the Q-SYS designer.
IMPORTANT: Do not make any changes in the nnounce configuration UI - DSP designer and Network stream - to avoid malfunction.
Default DSP design:

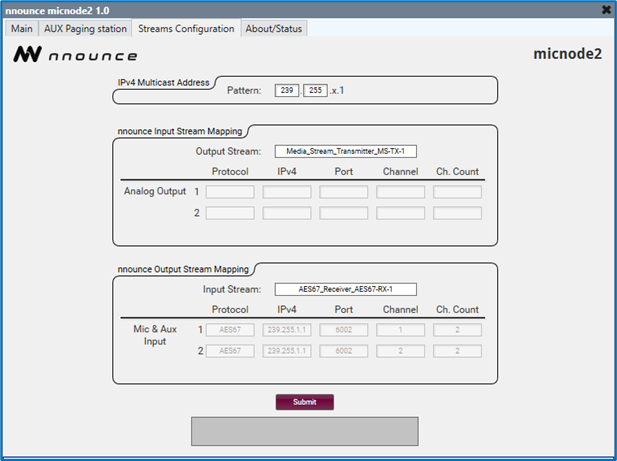
Option: Advanced Mode
The Advanced mode lets you set up manually your micnode2 device’s protocols, IP addresses, ports etc. for your streams.
1. Open the Streams Configuration section of your micnode2 plugin.
IMPORTANT: No values are auto filled in.
2. Map your stream/s:
- Protocol – stream protocol,
- IP address – fill in the address depending on multicast or unicast stream,
- Port – stream port number,
- Channel – define the particular channel of the stream,
- Ch. Count – sets the total number of channels of the stream.
IMPORTANT: micnode2 stream configuration needs to correspond to receiver and/or transmitter configuration in your Q-SYS designer.
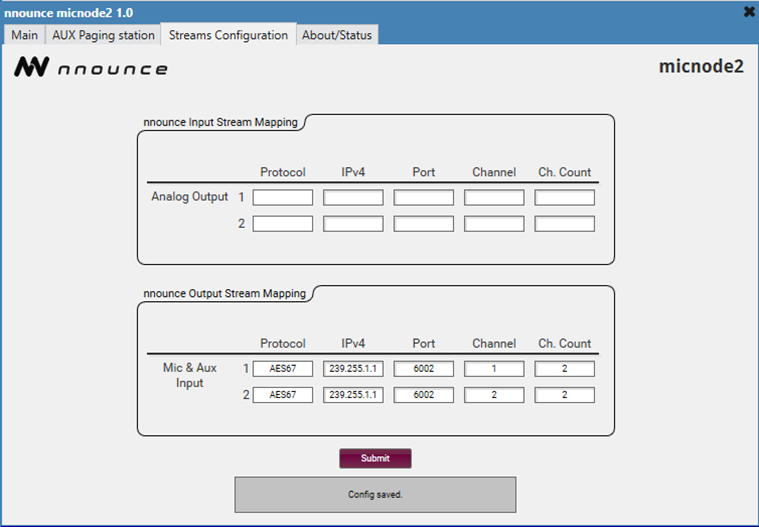
3. Confirm your configuration with the Submit button.
NOTE: The field below the Submit button will show the progress and validation messages in case of any connection errors.
The DSP designer in the nnounce configuration UI takes over the design from Q-SYS only unless no custom design is created by the user. The Network Streams section shows the streams as configured in the Q-SYS designer.
- TX stream – transmits audio to other devices, output.
- RX stream – receives audio from other devices, input.
IMPORTANT: Do not make any changes in the nnounce configuration UI - DSP designer and Network stream - to avoid malfunction.
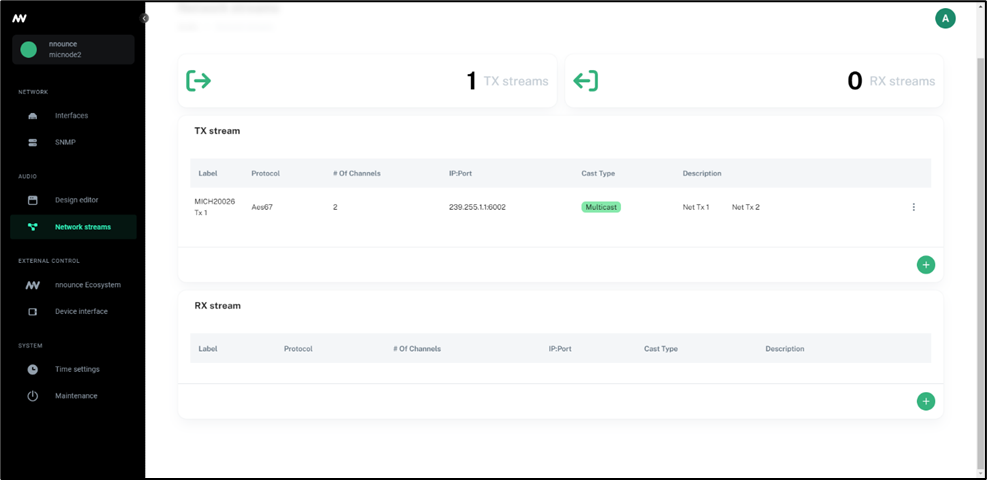
Example of network stream configuration in nnounce configuration UI:
Was this article helpful?