Data-driven content lets you pull live values — like a ticketing counter number — into your display designs instead of typing them in by hand. It builds on the basic display templates covered in the previous tutorial, this time using custom fields to make part of the design dynamic.
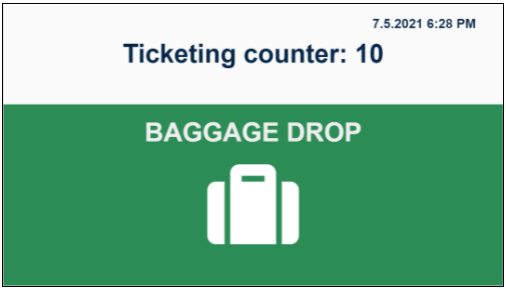
A good example is a ticketing counter display. Our goal is to create a screen design where the counter number is stored as part of the display configuration, using the Ticketing custom field. This field needs to be configured before you create the content — you can set or change any custom field value under Custom fields in the Assets category of the left main menu sidebar.
The same approach works for other dynamic values too, such as check-in counter numbers, baggage belt numbers, and gate numbers.
Topics covered:
Templates tab - Designer:
Dynamic text-driven by display asset values,
Date & time feature
Sample screen:
TUTORIAL STEPS:
A) To categorize your screens or add any other attributes, use Custom Fields. Here you can create a new field called "Ticketing" for your displays with your custom values.
|
|
B) Configure your new Custom Field. Under Add New Custom Field, fill in the attributes.
|
|
C) Assign a ticketing counter number to your display using the predefined asset values on the Displays tab. |
|
D) Design new content in the Templates tab - see how to do this in the Create basic STATIC content tutorial. | |
E) Add Dynamic text to your canvas.
|
|
F) Dynamic Text Editor will allow you to compose text from data & custom fields using the list on the right side of the editor. You can also include any static text.
|
|
G) Style your Dynamic Text using the right-hand sidebar.
|
|
H) Add a Date & Time element.
|
|
I) Preview the designed content template.
|
|
J) Click on the Save & Publish button in the lower right-hand corner when your content is final. Now it is ready to be assigned and shown on your display. |
|
K) Further design ideas to enhance your ticketing display content:
|
|
.JPG)
.JPG)
.JPG)
.JPG)
.JPG)
.JPG)
.JPG)
.JPG)
.JPG)
.JPG)