Dynamic text can display more than custom field values — it can also pull in live data from external sources, like flight information. You've already used dynamic text in the tutorial on Ticketing display content, where it displayed a custom field stored in the display's configuration.
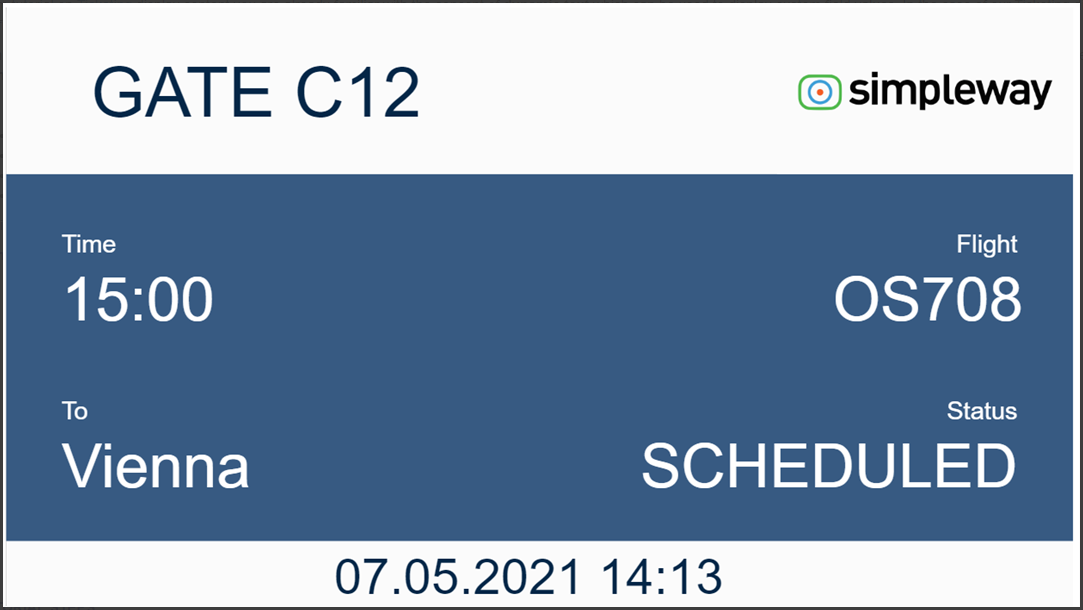
In this tutorial, we'll design content for a Gate area screen that shows flight data from the gate associated with the display, driven by preconfigured flight data sources.
Our Gate screen will show the following information:
Destination
Scheduled departure time
Flight code
Flight status
Topics covered:
Templates tab - Designer:
Dynamic text driven by flight data,
Shapes
Sample screen:
TUTORIAL STEPS:
Prerequisite: Assign a value to the Gate asset field on your display. Revisit tutorial Connect and configure DISPLAYS to see how to do it.
| |
B) Select the Data source for your Gate display content template. The data source determines a specific data set that will provide dynamic data to your content based on the assigned Gate asset field.
|
|
C) Add Dynamic Text to your template.
|
|
D) In Dynamic text editor, select the data you want to render in your dynamic text.
|
|
E) Configure your dynamic text in the right-hand sidebar.
|
|
| |
G) Now, it's time to add some style to your design. Add a Rectangle to highlight your flight information and use the right-hand sidebar to set colors and fonts of all the elements to the desired look.
Note: Set the Rectangle backward with the Backward icon in the upper menu to not overlap your text. |
|
H) Further design ideas to enhance your Gate content:
|
|
I) Preview the created content template with dynamic data by assigning display configuration
|
Note: Flight must be assigned to the selected gate to preview the flight relevant information - see tutorial Change FLIGHT DATA to assign flights to your gate. Additionally, you need to choose a flight with departure time not more than 90 minutes from now on, else it will not be visible. This is due to flight window configuration for gate displays. The selected display needs to have the same Gate value configured in the Asset values part on Displays tab, see Connect and configure DISPLAYS. |
J) Click on the Save & Publish button in the lower right-hand corner when your content is final. Now it is ready to be assigned and shown on your display. |
|
.JPG)
.JPG)
.jpg)
.JPG)
.JPG)
.JPG)
.JPG)
.JPG)