The Visual paging tool is tied to the Simpleway voice module. This tool allows you to visualize audio messages on your displays so that passengers can hear the message from the amplifiers and at the same time see the message transcript on displays with a pre-configured visual paging element.
To see and hear the same announcement from amplifiers and displays, they must be selected in the zones in which the announcement is played. This means that you must select zones that include both audio device outputs and display configurations before playing the announcement. Templates with a visual paging component must be assigned to these displays, as described below.
To setup visual paging on your displays, you need to complete the following steps:
In the Zones tab:
Group display configurations into zone see tutorials: Connect and configure DISPLAYS and Zoning your audio and display devices).
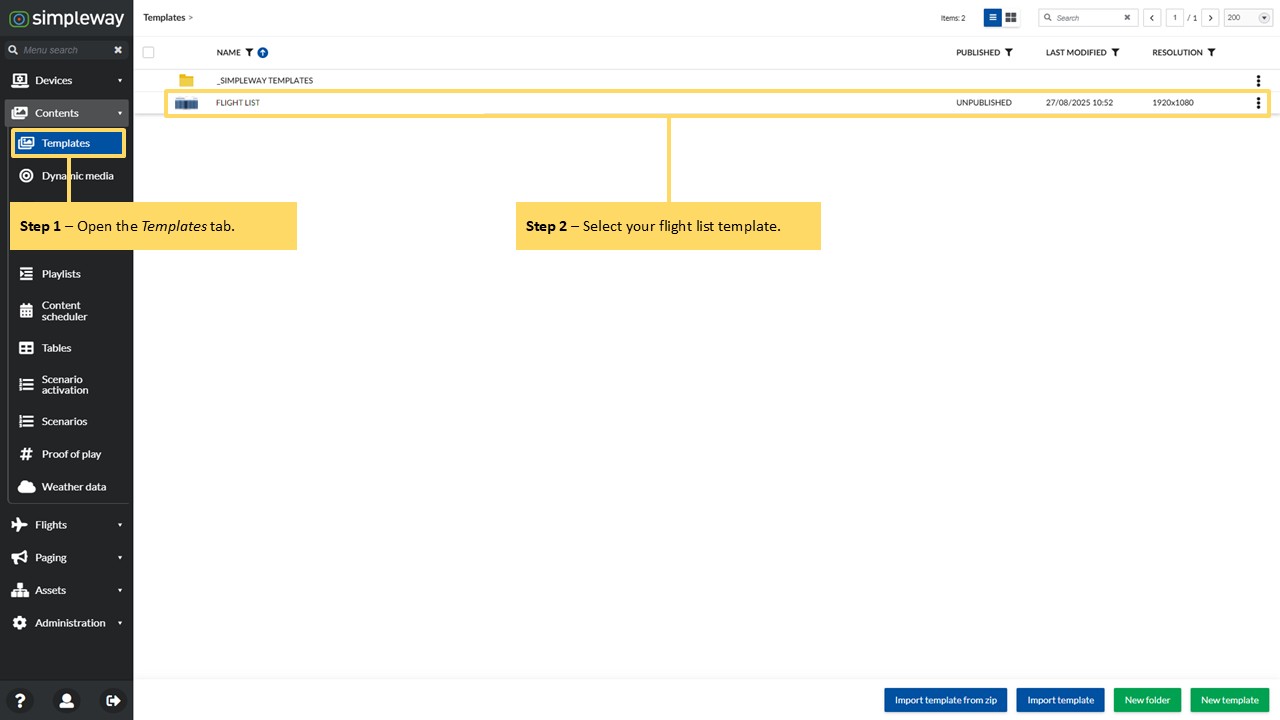
In the Templates tab:
Create the Visual paging component in the content template, see below tutorial steps.
In the Displays tab:
Assign the content template to displays, see tutorial Assign a Simpleway provided TEMPLATE to a display
This tutorial will show you how to create the Visual paging component in the previously created FLIGHT LIST template which then can be assigned to displays.
Topics covered:
Visual messaging tab
Templates tab
Zones tab
TUTORIAL STEPS:
A) Templates tab
|
|
B) Visual paging widget
|
|
C) Click the Visual Paging Editor button on the sidebar. A Components window opens. |
|
D) Create a New component
|
|
E) Insert the Visual paging text
|
|
F) Stylize your visual paging text
|
|
G) Setup the visual effects
The visual effects section offers two modes:
|
|
H) Select the earlier created component in the Components window. |
|
I) Reposition the Visual paging component to match your requirements. Save & Publish the template when you are done. |
|
J) You may now assign the template to your display, see tutorial Assign CONTENT TEMPLATE to a display | |
K) Start to play an announcement with visual component from the Ad hoc announcements tab, see tutorials: You will see on your displays with assigned templates in the same zone the transcript of your announcement which is played in the same audio zones. | |
.JPG)
.JPG)
.JPG)
.JPG)
.JPG)
.JPG)
.JPG)
.JPG)