- 17 Sep 2025
- 3 Minutes to read
- Print
- PDF
GateUI - boarding process announcements
- Updated on 17 Sep 2025
- 3 Minutes to read
- Print
- PDF
GateUI is a web application used by airport personnel, such as boarding gate or transfer desk staff for playing flight-specific announcements at the gate. GateUI allows users to see the information concerning only the gate/location they actually operate, therefore, they can activate announcements for the flights assigned to their gate with very customized content and up-to-date information. It is also possible to play non-flight related general announcements from the GateUI.
IMPORTANT: You can customize the GateUI with your announcements that follow YOUR bording process such as boarding per row, boarding class, specific airline announcement etc.
The UI guides you through the boarding process announcements. Trigger the individual announcements as boarding progresses and in case of any irregularities the UI enables you to start to play:
- Delay announcement,
- Cancel flight announcement,
- Gate change announcement.
For your demo instance, access the GateUI by typing into your browser the URL: https://your instance access URL/gate/demo, for example: https://air-tyx5.simpleway.cloud/gate/demo. In order to see flight data in GateUI, you must select the Gate asset value corresponding to the flight data in gate configuration on the UI configurations tab, please see Configure GateUI.
- GateUI
Main GateUI screen:
.jpg)
TUTORIAL STEPS:
A) Login
Note: You can use the other login methods listed on the right side of the login page. | .JPG) |
B) Main GateUI screen
| 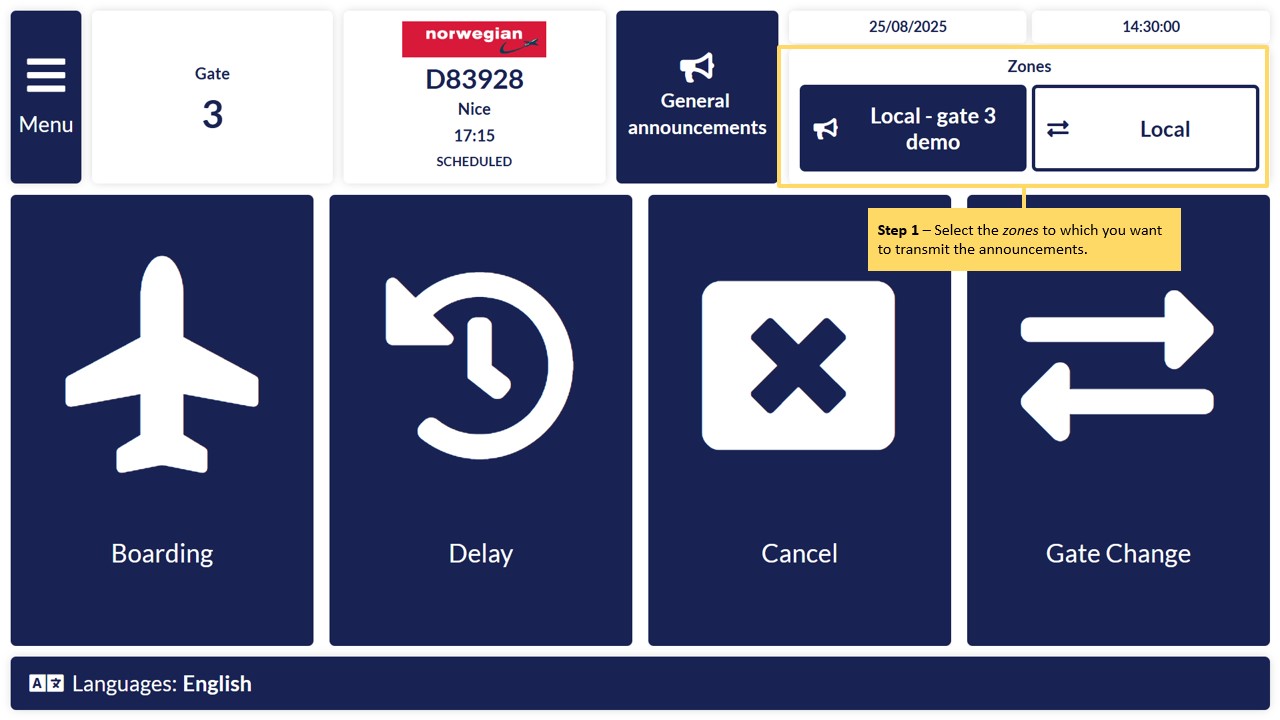 Note: If you do not see a flight assigned to the GateUI, you should know that flight assignment is based on a preset configuration: Note: If you do not see a flight assigned to the GateUI, you should know that flight assignment is based on a preset configuration:
|
C) Boarding process
To play non-flight related general announcements use the General announcements category tile. | 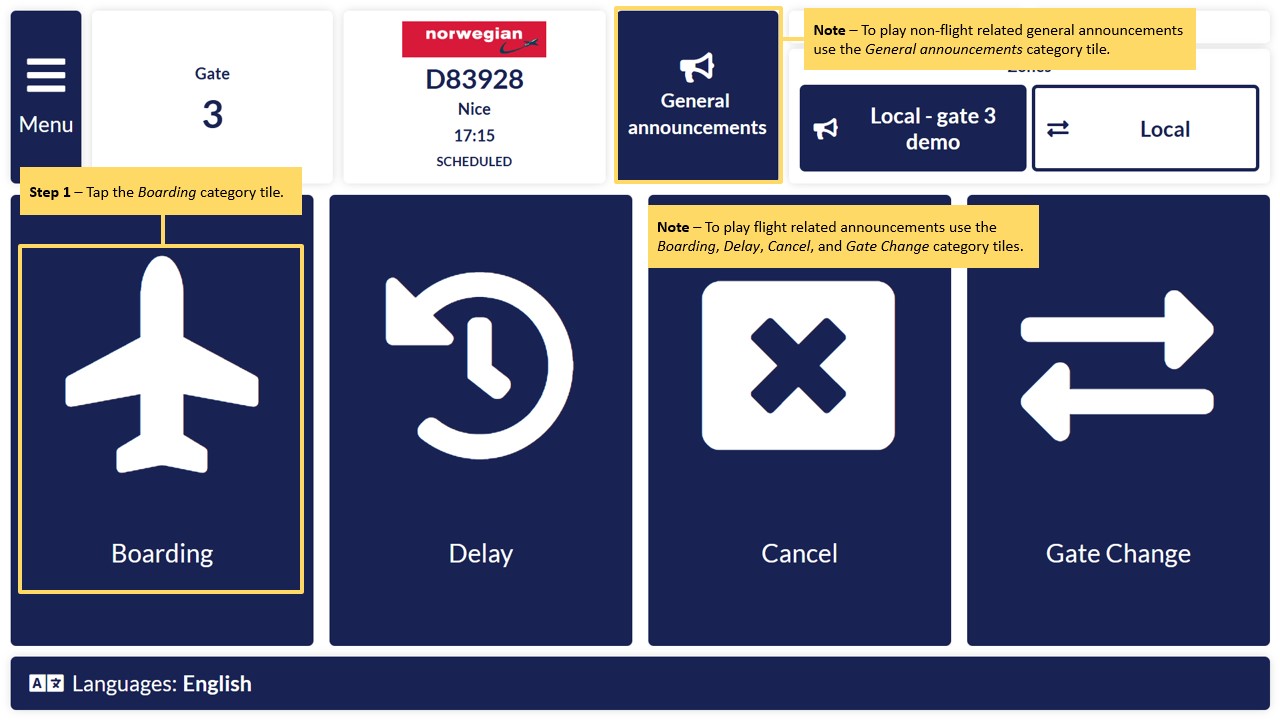 |
D) Playing selected announcement
Note: By clicking on the arrows, the user is navigated to the previous (left arrow) or next subcategory (right arrow). The left arrow works as a back button to return to the previous level of the category structure when the first subcategory is selected. | 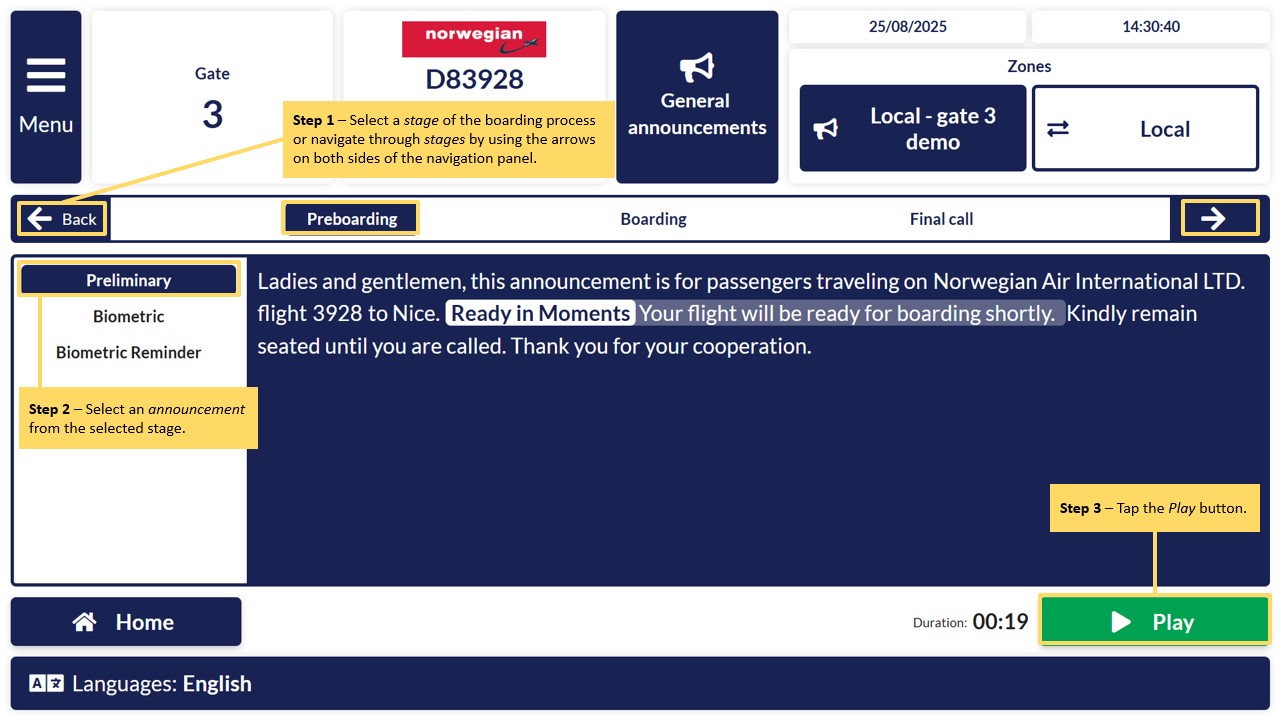 |
| E) Playback process After pressing the Play button a playback sub-window will open:
| 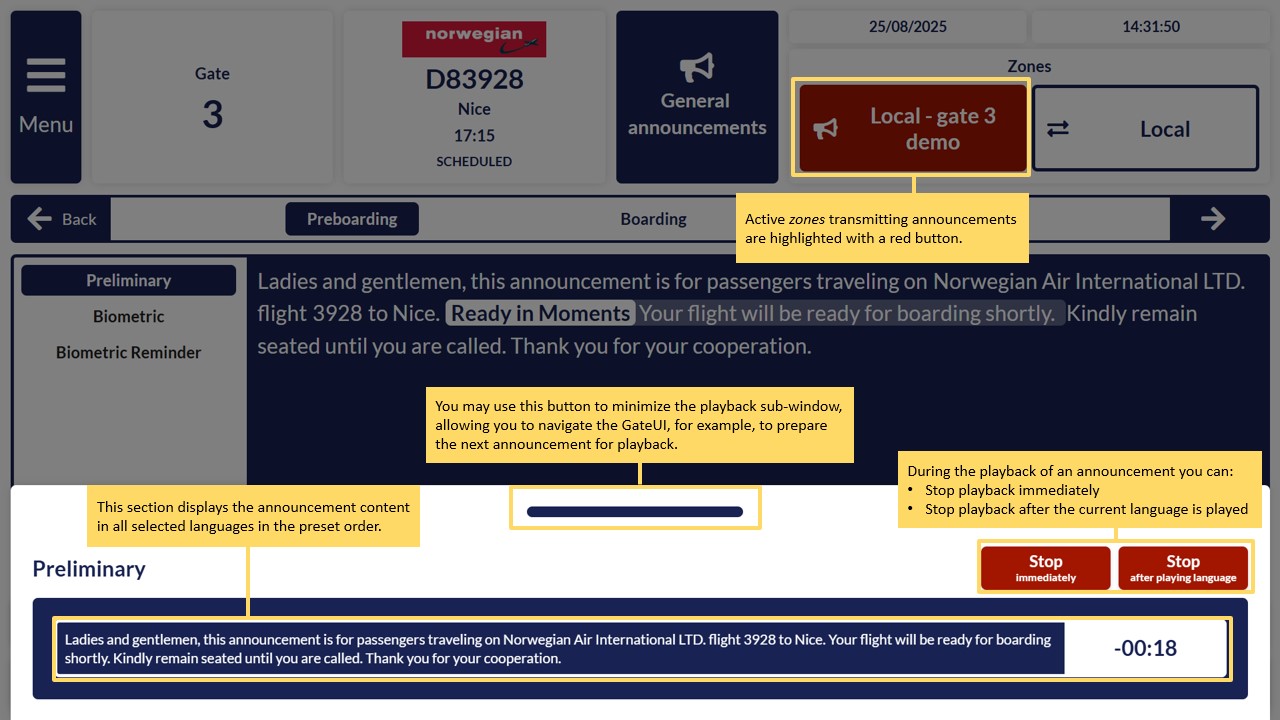 Note: "Local demo" zones that are preconfigured to play to your client speakers for preview purposes are not highlighted with a red button when transmitting announcements. Note: "Local demo" zones that are preconfigured to play to your client speakers for preview purposes are not highlighted with a red button when transmitting announcements. |
F) Menu - additional features
| 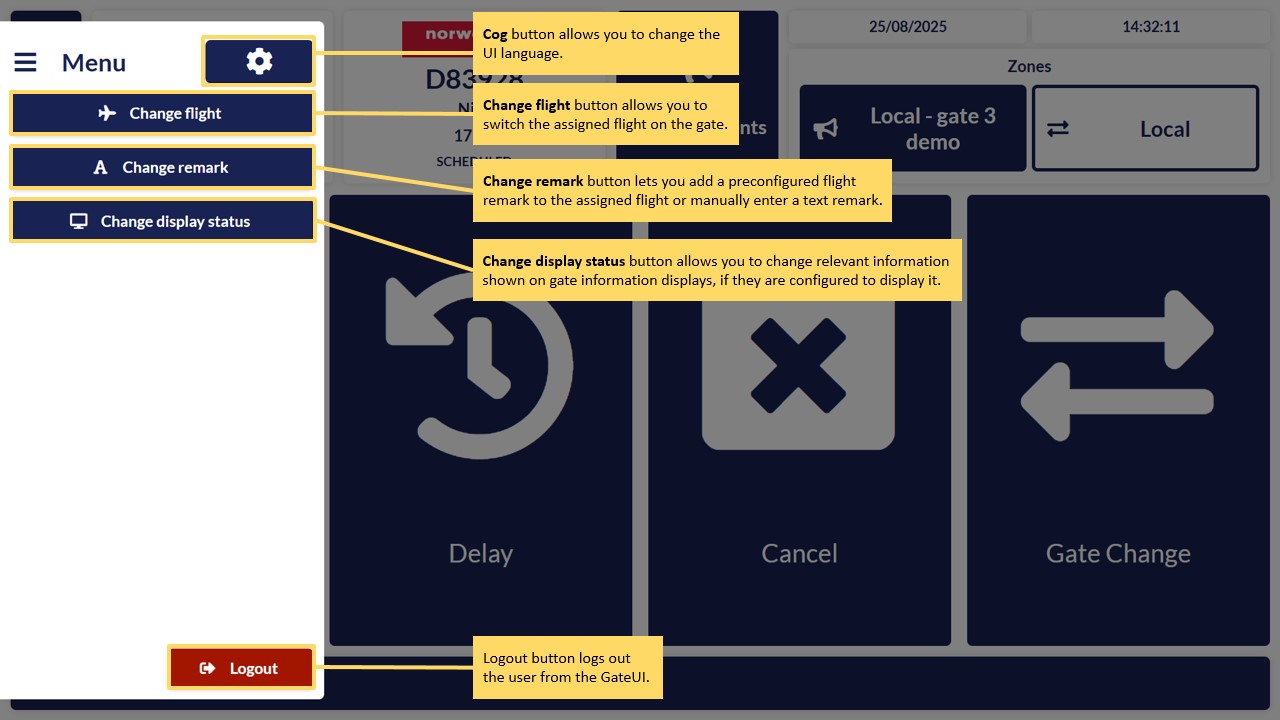 |

