- 08 Oct 2025
- 2 Minutes to read
- Print
- PDF
Connect and configure DISPLAYS
- Updated on 08 Oct 2025
- 2 Minutes to read
- Print
- PDF
Let's get started with connecting your display to the Simpleway CX platform and some initial display configurations in the the user interface.
For your trial, you can use our Simpleway desktop media player SimpleVUE to see the designed content right on your computer screen.
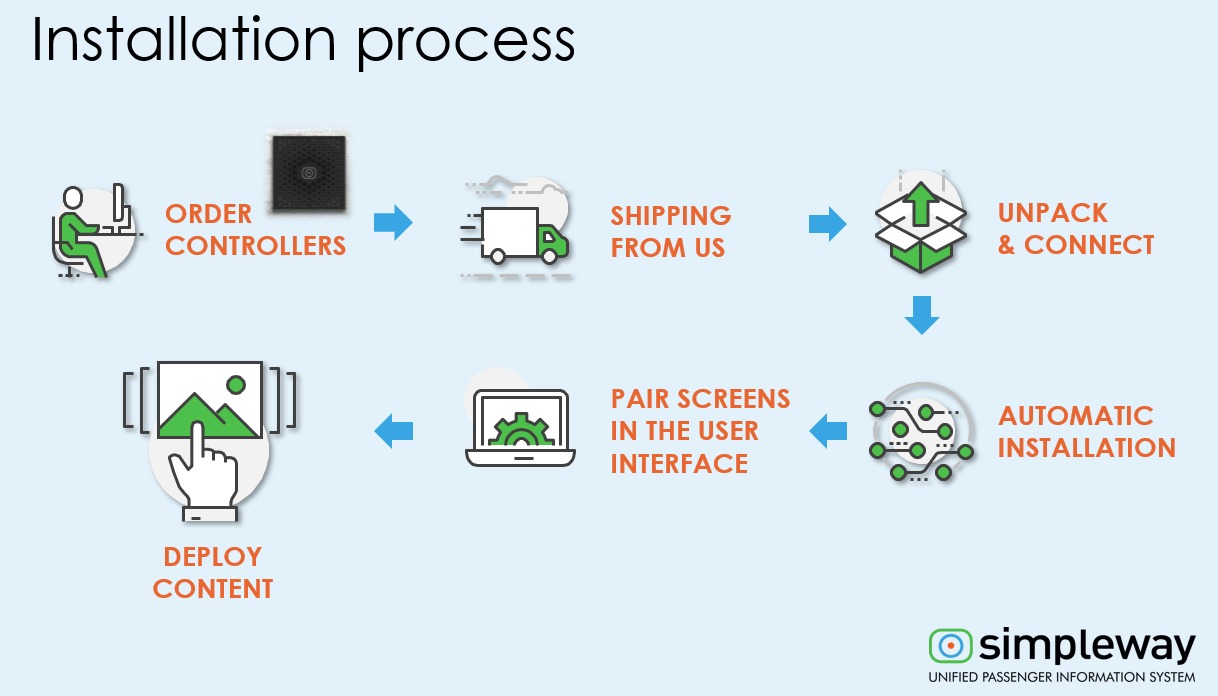
However, designing content and showing it on the same computer in the SimpleVUE media player is limited. To get the best from our product, we offer you the ability to order our Simpleway display device controllers as illustrated below, delivering a 3rd generation high video performance for heavy-duty operations.

Topics covered
Display device connected to the system
Display tab - display client configuration
Custom fields
TUTORIAL STEPS:
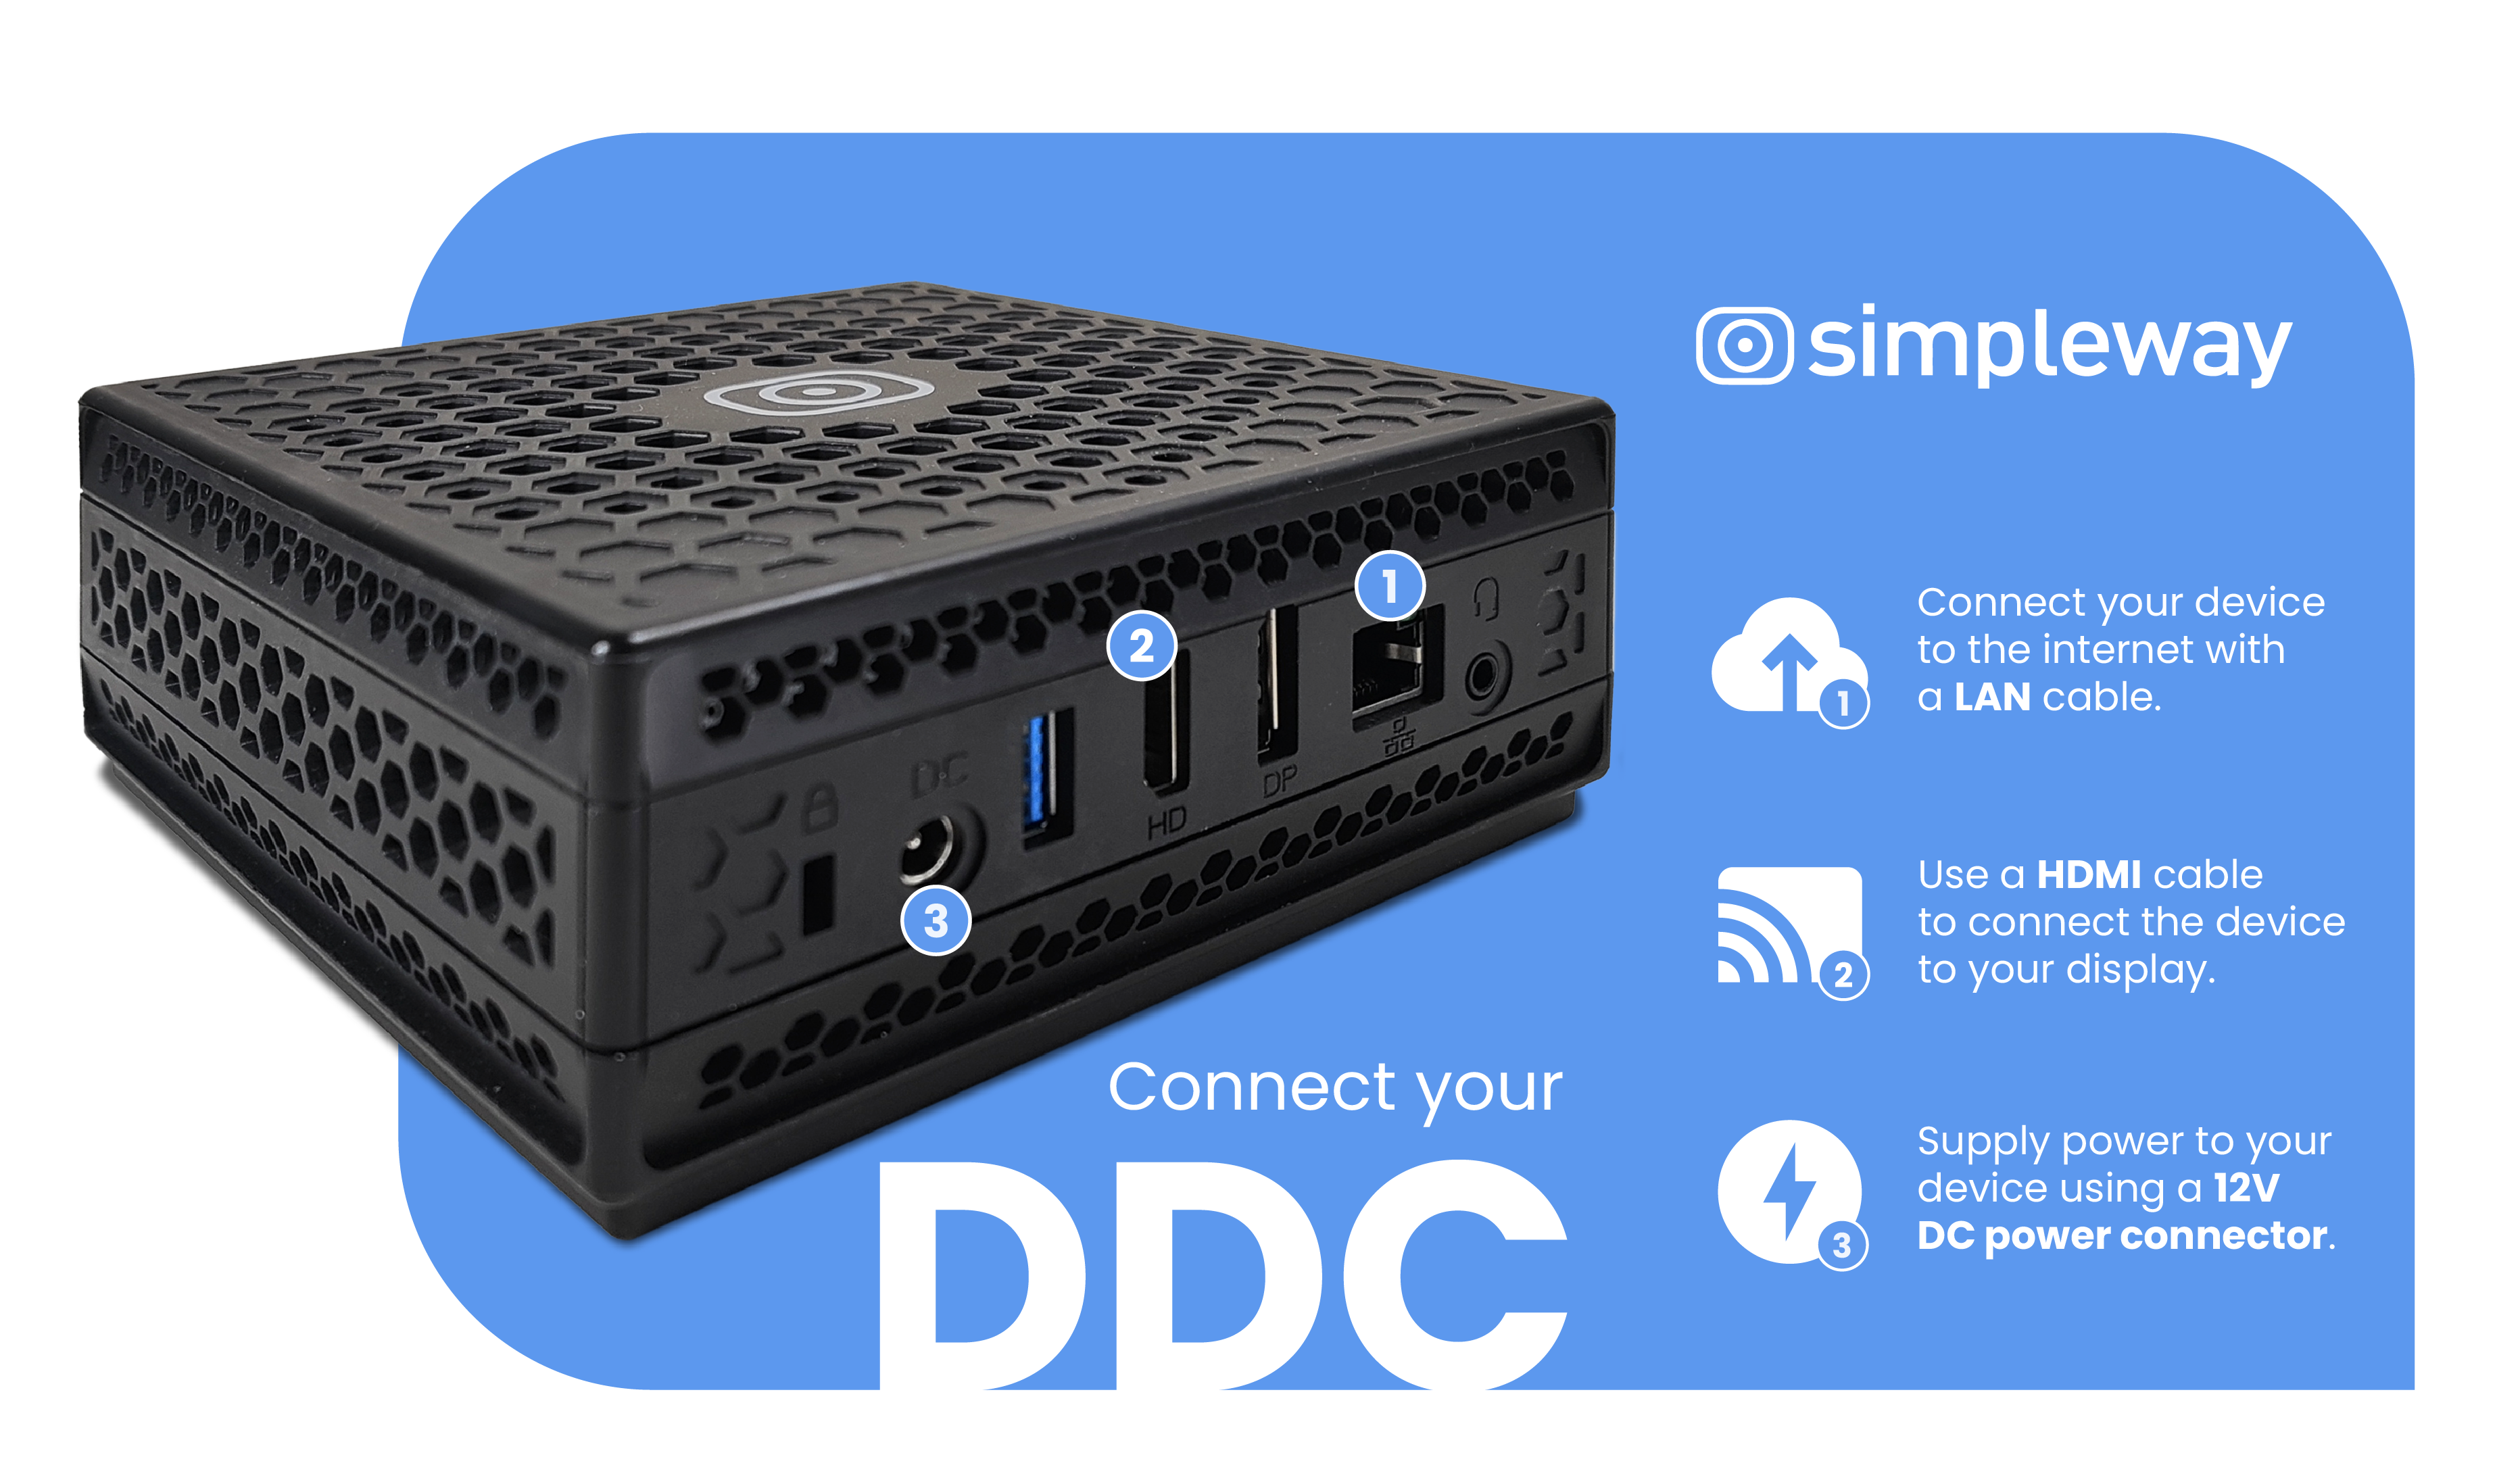
A) There are two ways to set up a display for use with Simpleway CX: Using Simpleway desktop media player SimpleVUE on any compatible Windows PC: a. Download the latest version of the SimpleVUE desktop media player installer from this link: simplevue.simpleway.global/SimpleVueInstaller.msi. Note: The installation file will usually be downloaded to your PC desktop or Downloads folder. b. Run the SimpleVueInstaller.msi and select "TRIAL" mode for the SimpleVUE installation into your PC. Note: Microsoft Defender might be blocking the installer; please select the "Run Anyway" option in the dialog window. c. At the end of the installation process, select the option Launch SimpleVUE. d. Unconfigured client screen shows up when finished (see the picture in step B below) together with live view monitoring window. e. Minimize the SimpleVUE player or move it to your second monitor, if necessary, to access the Simpleway CX trial user interface from a link inside the confirmation email. f. SimpleVUE application can be found in the Windows Start menu. OR a. Unpack and connect the display controller to LAN and power. Note: While Wifi is supported, for reliable production, use of ethernet is highly recommended. b. Connect your display device using an HDMI cable to the display controller. c. Power on both devices, the display controller will be automatically updated and configured itself until Unconfigured client screen shows up (see the picture in step B below).
| |
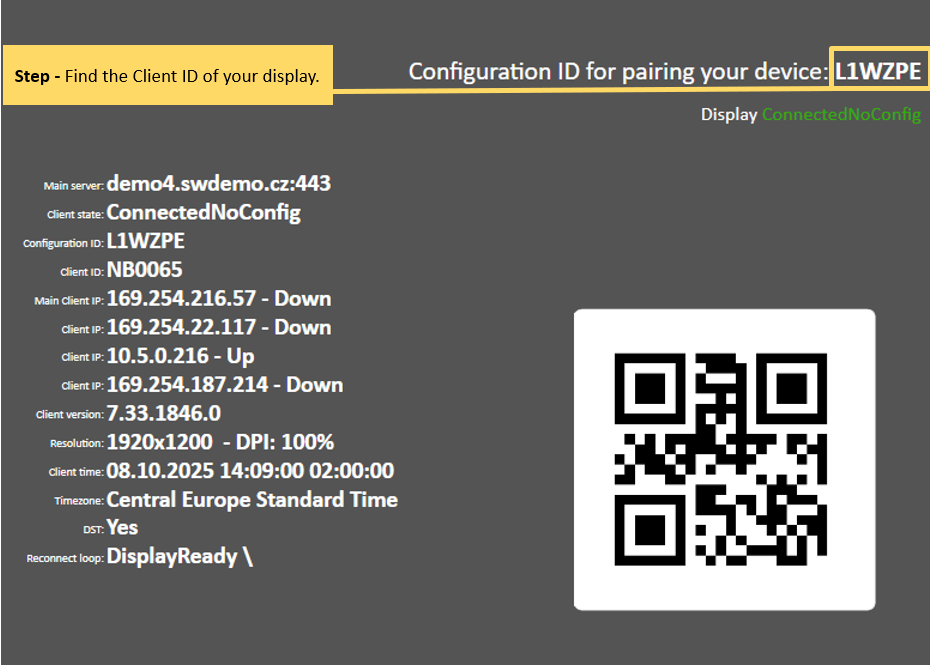
B) Your display will show an unconfigured client screen with the Configuration ID. |
|
C) Log in to your Simpleway CX trial instance using either your SSO credentials or the email and password you used to register for the trial. | |
D) The Simpleway CX user interface opens and find the tab Displays in the menu to pair your display.
| |
Enter Configuration ID from the SimpleVUE unpaired client and click Add button. |
|
E) Configure your display settings.
| Asset values enable you to categorize your displays and assign them specific attributes for data-driven content rendering. You can do this step later in this window for each display. You can create your airport-specific asset values in the Assets section as Carriers, Gates, etc. Additionally, you can create your custom values on the Custom fields tab and use them to categorize your screens. See how to set up your assets in the tutorial Configure your AIRPORT assets. |
| |


.JPG)
.JPG)
.jpg)
.JPG)