Q-SYS Ecosystem Integration
- 05 Feb 2026
- 2 Minutes to read
- Print
- PDF
Q-SYS Ecosystem Integration
- Updated on 05 Feb 2026
- 2 Minutes to read
- Print
- PDF
Article summary
Did you find this summary helpful?
Thank you for your feedback!
Description
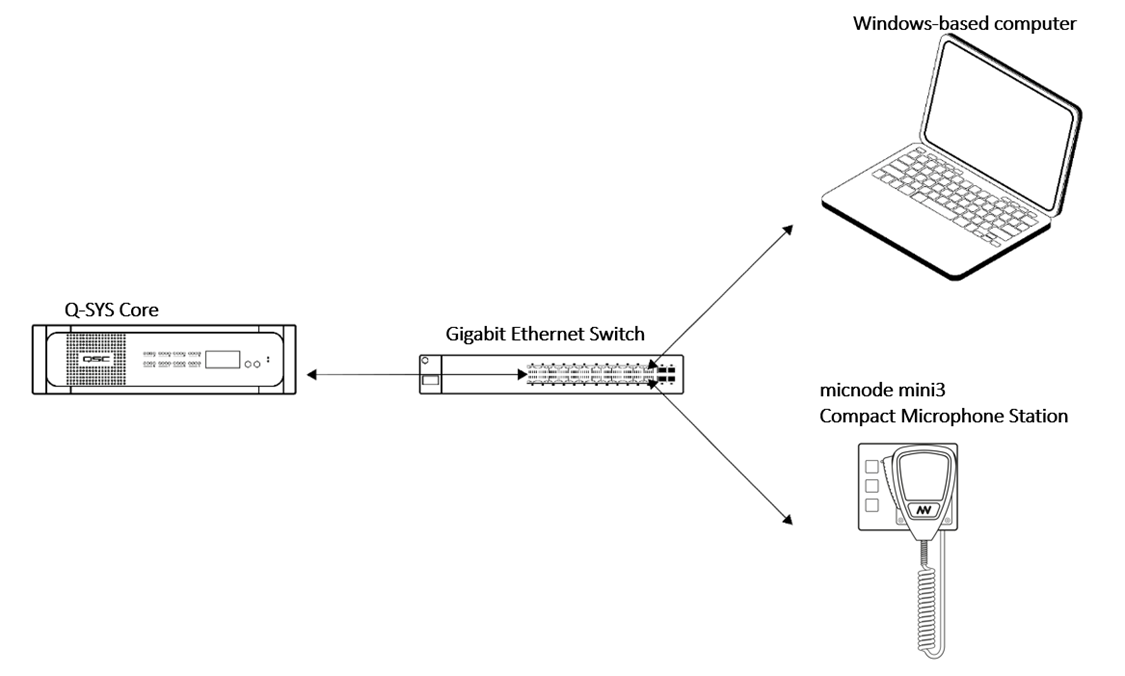
In the previous chapter, you connected your micnode mini3 microphone station to the network via a standard Ethernet cable. To add your new device tothe Q-SYS audio network, the system should consist of:
Q-SYS Core and further Q-SYS peripherals,
Windows-based computer for Q-SYS Designer network setup, not required for runtime operation,
Gigabit Ethernet switch with PoE ports.
Network overview:
NOTE: Q-SYS designer version 9.10.1 pictures used in this manual are for illustration purposes only.
To make your mic station operable within the Q-SYS ecosystem, follow the steps which are described in more detail in the chapters below:
Download the Q-SYS plugin for micnode mini,
Configure the plugin in Q-SYS Designer,
Set up the stream,
Configuration zone/action buttons.
Q-SYS Plugin - Download & Configuration
To configure the micnode mini3 microphone station, install the respective plugin for Q-SYS Designer so that you can then set up the device’s properties.
IMPORTANT: Configuration from Q-SYS Designer is automatically populated to the nnounce configuration UI and thus your micnode mini6 device.
1. The nnounce micnode mini plugin for Q-SYS Designer can be obtained from:
Q-SYS library, or
nnounce website in the Download center.
2. Place the downloaded plugin file on your computer in the folder: C:\Users\username\Documents\QSC\Q-Sys Designer\Plugins and unpacked.
3 Open Q-SYS Designer.
4. In the right-hand panel, locate the micnode mini plugin and drag it into your design.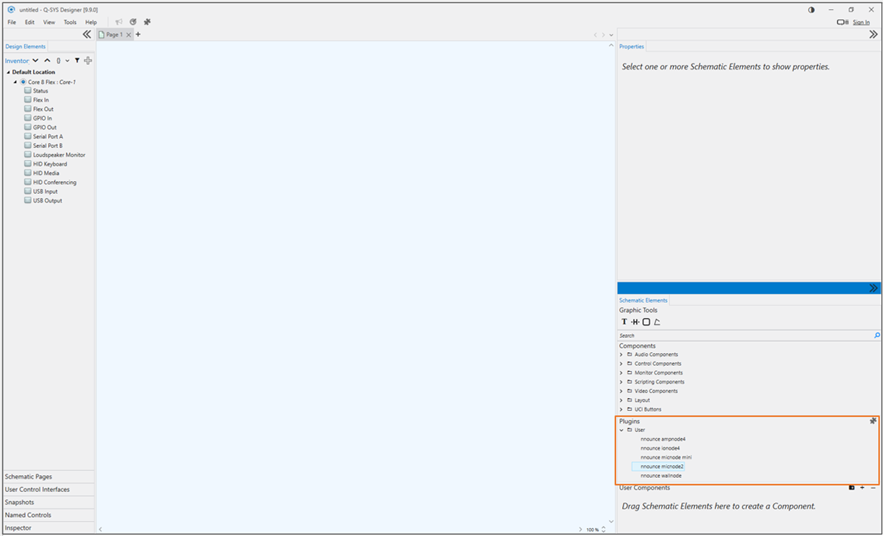
Plugin:

5. Setup the plugin Properties of your micnode mini3 microphone station.
NOTE: Properties open in the right-hand panel by simple click on the micnode mini3 plugin.
Model – select the micnode mini model - mini3 - three button compact microphone station
Configuration Mode– select stream configuration mode:
Basic – default micnode mini design is applied and stream configuration is predefined for you. NOTE: An existing default configuration is not overwritten.
Advanced – manual design and stream configuration. Streams Net Tx channel numbering needs to be correct according to conventions applied. Default design is applied when no other design is created.
Manual - configuration is performed in nnounce configuration UI and is automatically populated to the plugin.
Unit ID – number your device, it is important to assign a unique number, we recommend ascending numbering of your microphone stations.
IMPORTANT: The number is further used for stream configuration.
Zone / action buttons - set the button purpose, as further described in tutorial Microphone Station Buttons Configuration.
Show Debug – set debugmode level
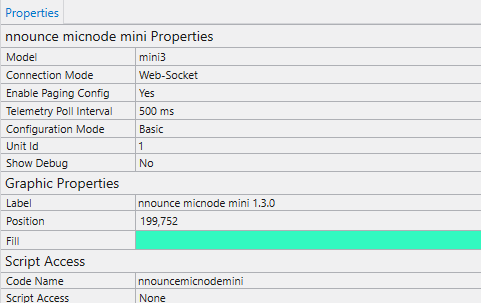
NOTE: Connection Mode will be selected based on Q-SYS version. In older versions TCP socket needs to be manually selected. Web-Socket with encryption is supported since Q-SYS version 9.8.
IMPORTANT:
If no device is connected, use TCP socket mode to prevent Q-SYS Core freeze (versions 9.10.2 and 9.13)
Recommended Q-SYS version for redundant deployment is 9.10.2.
In version 9.13, port 1710 is not functional.
6. Create your design in Q-SYS or add the micnode mini3 to an existing audio configuration. Make sure that the design is disconnected for this step.
7. Select Save to core & Run. Then open the micnode mini3 plugin details and set Host/IP of the micnode mini3 device.
NOTE: For a secured Web-Socket connection it is required to use domain name of the device.
IMPORTANT: Use the host as defined in the Connect the Device chapter above – micnode-mini3 followed by the last six digits of the station’s MAC address. Example: micnode-mini3-000000
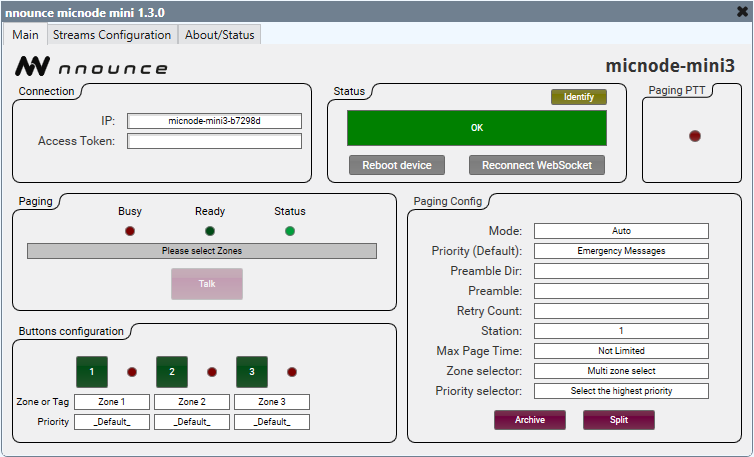
8. Upon successful connection status field shows OK.
Was this article helpful?