- 05 Feb 2026
- 5 Minutes to read
- Print
- PDF
Q-SYS Ecosystem Integration
- Updated on 05 Feb 2026
- 5 Minutes to read
- Print
- PDF
Description
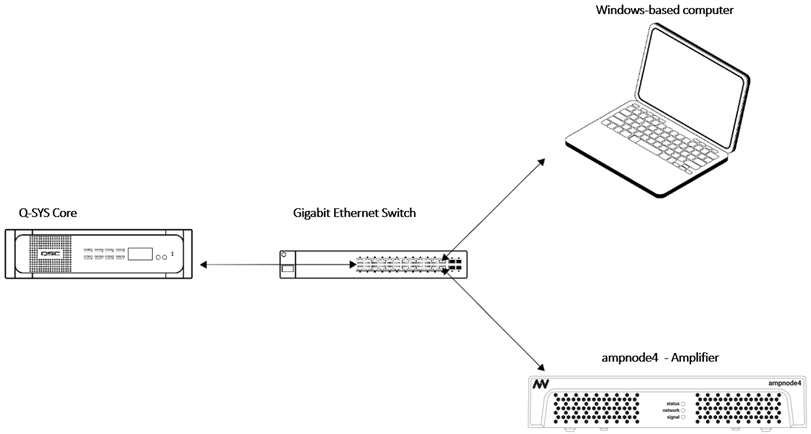
In the previous chapter you connected your ampnode4 amplifer to the network via a standard ethernet cable. To add your new device to the Q-SYS audio network, it should consist of:
Q-SYS Core + Q-SYS peripherals,
Windows-based computer for Q-SYS designer network setup, not required for runtime operation,
Gigabit Ethernet Switch.
Network overview:
NOTE: Q-SYS designer version 9.9.0 pictures used in this manual are for illustration purposes only.
To make your device operable within the Q-SYS ecosystem, follow the steps which are described in more detail in the chapters below:
Download the Q-SYS plugin for ampnode4,
Configure the plugin in Q-SYS designer,
Set up streams.
Q-SYS Plugin - Download & Configuration
To configure the ampnode4 device, you will need to install the respective plugin for Q-SYS designer so that you can then set up the device’s properties.
IMPORTANT: Configuration from the Q-SYS designer is auto populated to the nnounce configuration UI and thus your ampnode4 device.
The nnounce ampnode4 plugin for Q-SYS designer can be obtained from:
nnounce webpage in the Download center - https://www.nnounce.com/download-center.
The downloaded file with the plugin needs to be placed on your computer in the folder: C:\Users\username\Documents\QSC\Q-Sys Designer\Plugins
Open your Q-SYS designer.
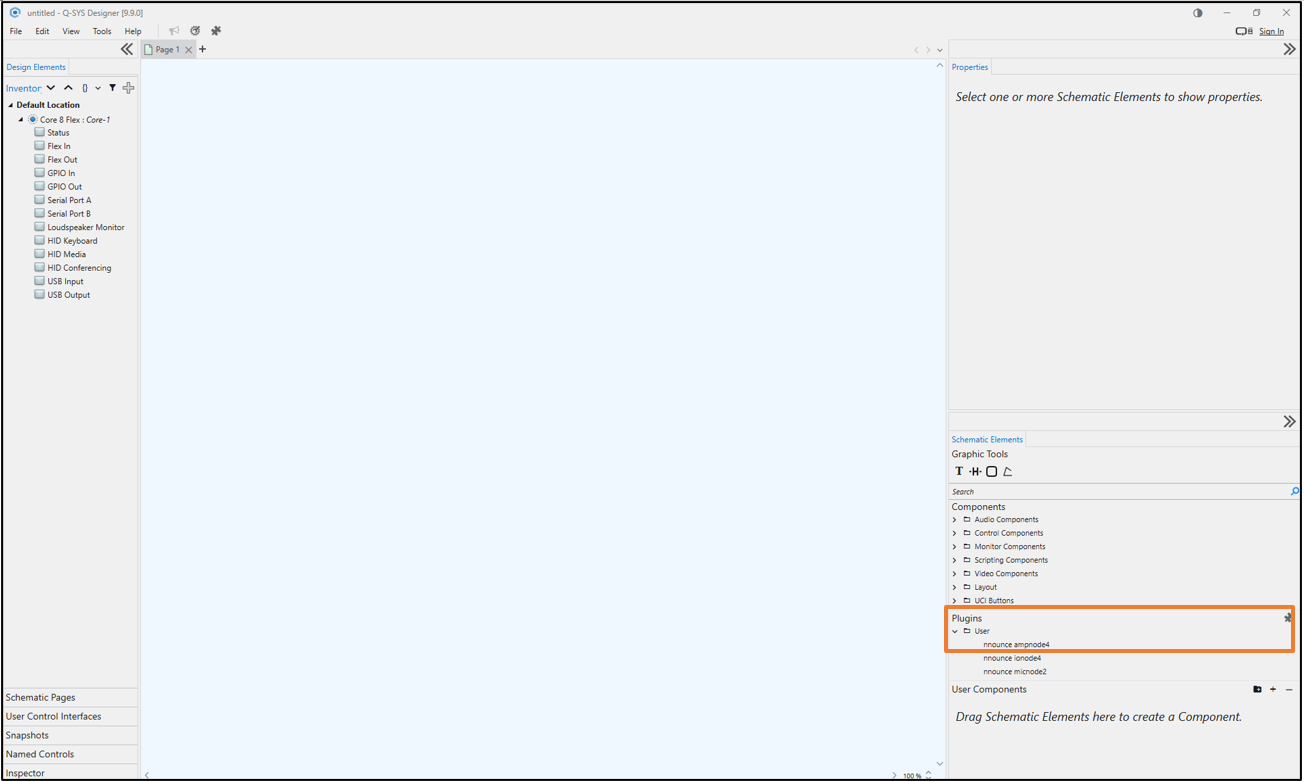
Find the ampnode4 plugin in the right panel below and drag and drop it into your design.
Example design with Components:
Receiver - ampnode4 AES67 RX (RTP streams available, see stream configuration for more details)
Transmitter – ampnode4 AES67 TX (RTP streams available, see stream configuration for more details)
NOTE: Receiver and Transmitter must be created separately.
See the relevant chapter below.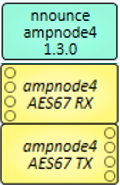
5. Set up the properties of your ampnode4 amplifier device:
NOTE: Properties are opened by simple click on the ampnode4 item in the right-hand panel.
Connection Mode - will be selected based on Q-SYS version.
Configuration Mode– select stream configuration mode:
Basic – default ampnode4 design is applied and stream configuration is predefined for you. NOTE: An existing default configuration is not overwritten.
Advanced – manual design and steam configuration. Streams Net Tx and Net Rx channel numbering needs to be correct according to conventions applied. Default design is applied when no other design is created.
Unit Id – number your device, it is important to assign a unique number, we recommend ascending numbering of your nnounce devices. IMPORTANT: The number is further used for stream configuration.
Show Debug – set level of debug mode.
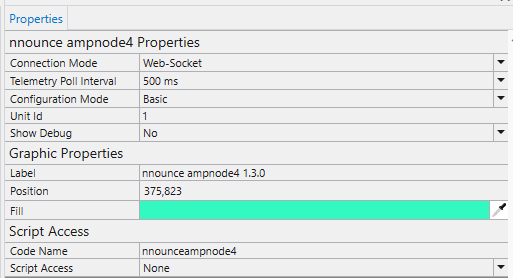
NOTE: Select the Connection Mode based on Q-SYS version. In older versions TCP socket needs to be manually selected. Web-Socket with encryption is supported since Q-SYS version 9.8.
IMPORTANT:
In case there is no device to connect, use the plugin Connection Mode TCP socket mode to prevent QSC-core freeze (versions 9.10.2 and 9.13).
The recommended version of Q-SYS for redundant deployment is 9.10.2.
For version 9.13 port 1710 is not working.
6. Create your design in Q-SYS or add the ampnode4 to your existing audio configuration. Make sure your design is disconnected.
7. Save to core & Run, after that open the ampnode4 plugin detail and set Host/IP of the ampnode4 device.
NOTE: For secured Web-Socket connection it is required to use domain name of the device.
IMPORTANT: Use the host as defined in the Connect the Device chapter above – ampnode4 dash and the last six numbers of the station’s MAC address. Example: ampnode4-250000
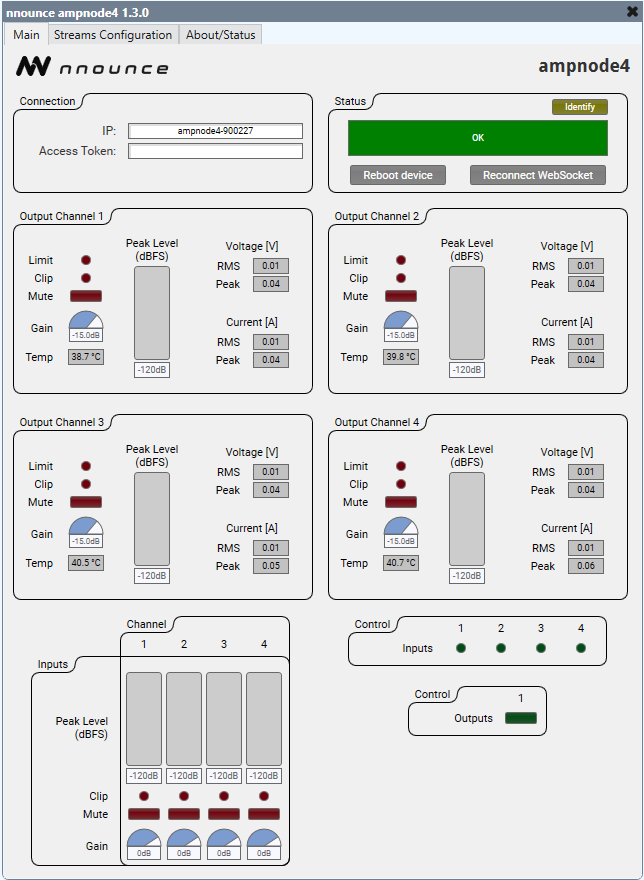
8. On successful connection, the status field should say OK.
Stream Configuration
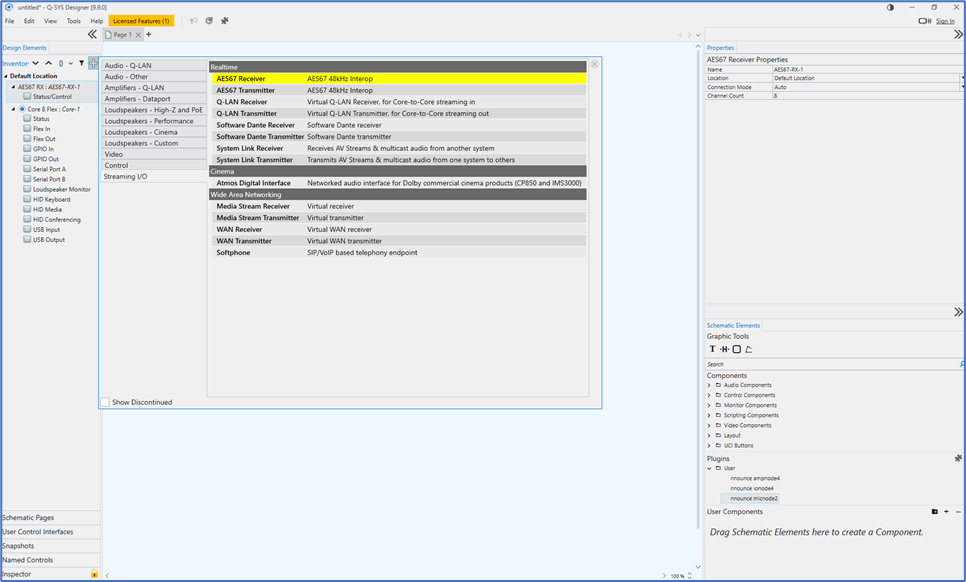
Create an AES67 stream in the Q-SYS designer. Select first the component and then configure it in the ampnode4 plugin.
1. Add the stream component to your Q-SYS design:
2. Set up stream properties: 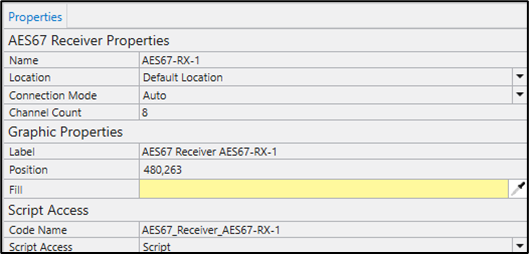
IMPORTANT: Streams need to have Script access set to the value Script. In older Q-SYS designer versions Script access is not visible in Stream properties. Rename the stream in a disconnected design. Only after that the stream is visible in the ampnode4 plugin.
Make sure your design is disconnected.
3. Once the Stream component is set up, switch to the ampnode4 plugin and configure the Streams Configuration section. Based on the chosen Configuration Mode Basic or Advanced in mic station Properties, the values are either prefilled in or you can set up the values manually.
Basic mode has a default design and preset ports, in the Advanced mode you create your own design and set manually your stream configuration.
IMPORTANT: Before you start to configure your device’s streams in the Streams configuration section of the plugin, Save to Core & Run your design.
Option: Basic Mode
1. The multicast address is filled in automatically. In the Basic mode the Pattern is the IPv4 first and second byte and the last number is your micnode2 Unit ID.
NOTE: This field is editable but prefilled, changes are visible in the stream IP address fields.
IMPORTANT: Unit ID is a number you have assigned to your device in the Properties section. It is important to assign a unique number, we recommend ascending numbering of your devices.
2. Select your streams from the dropdown.
IMPORTANT: The stream name needs to include TX for transmitter streams and RX for receiver streams.
3. Set the Interface of your stream and you can Activate and Deactivate a stream by clicking on the pink rectangle.
4. Confirm your configuration with the Submit button.
NOTE: The field below the Submit button will show the progress.
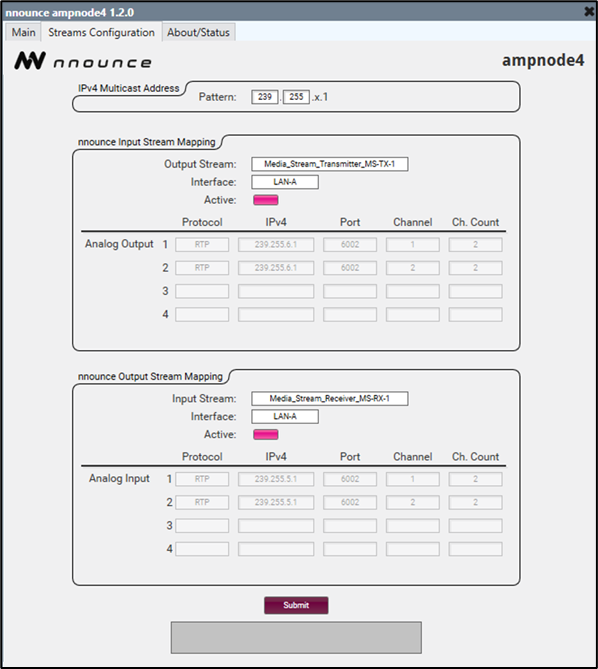
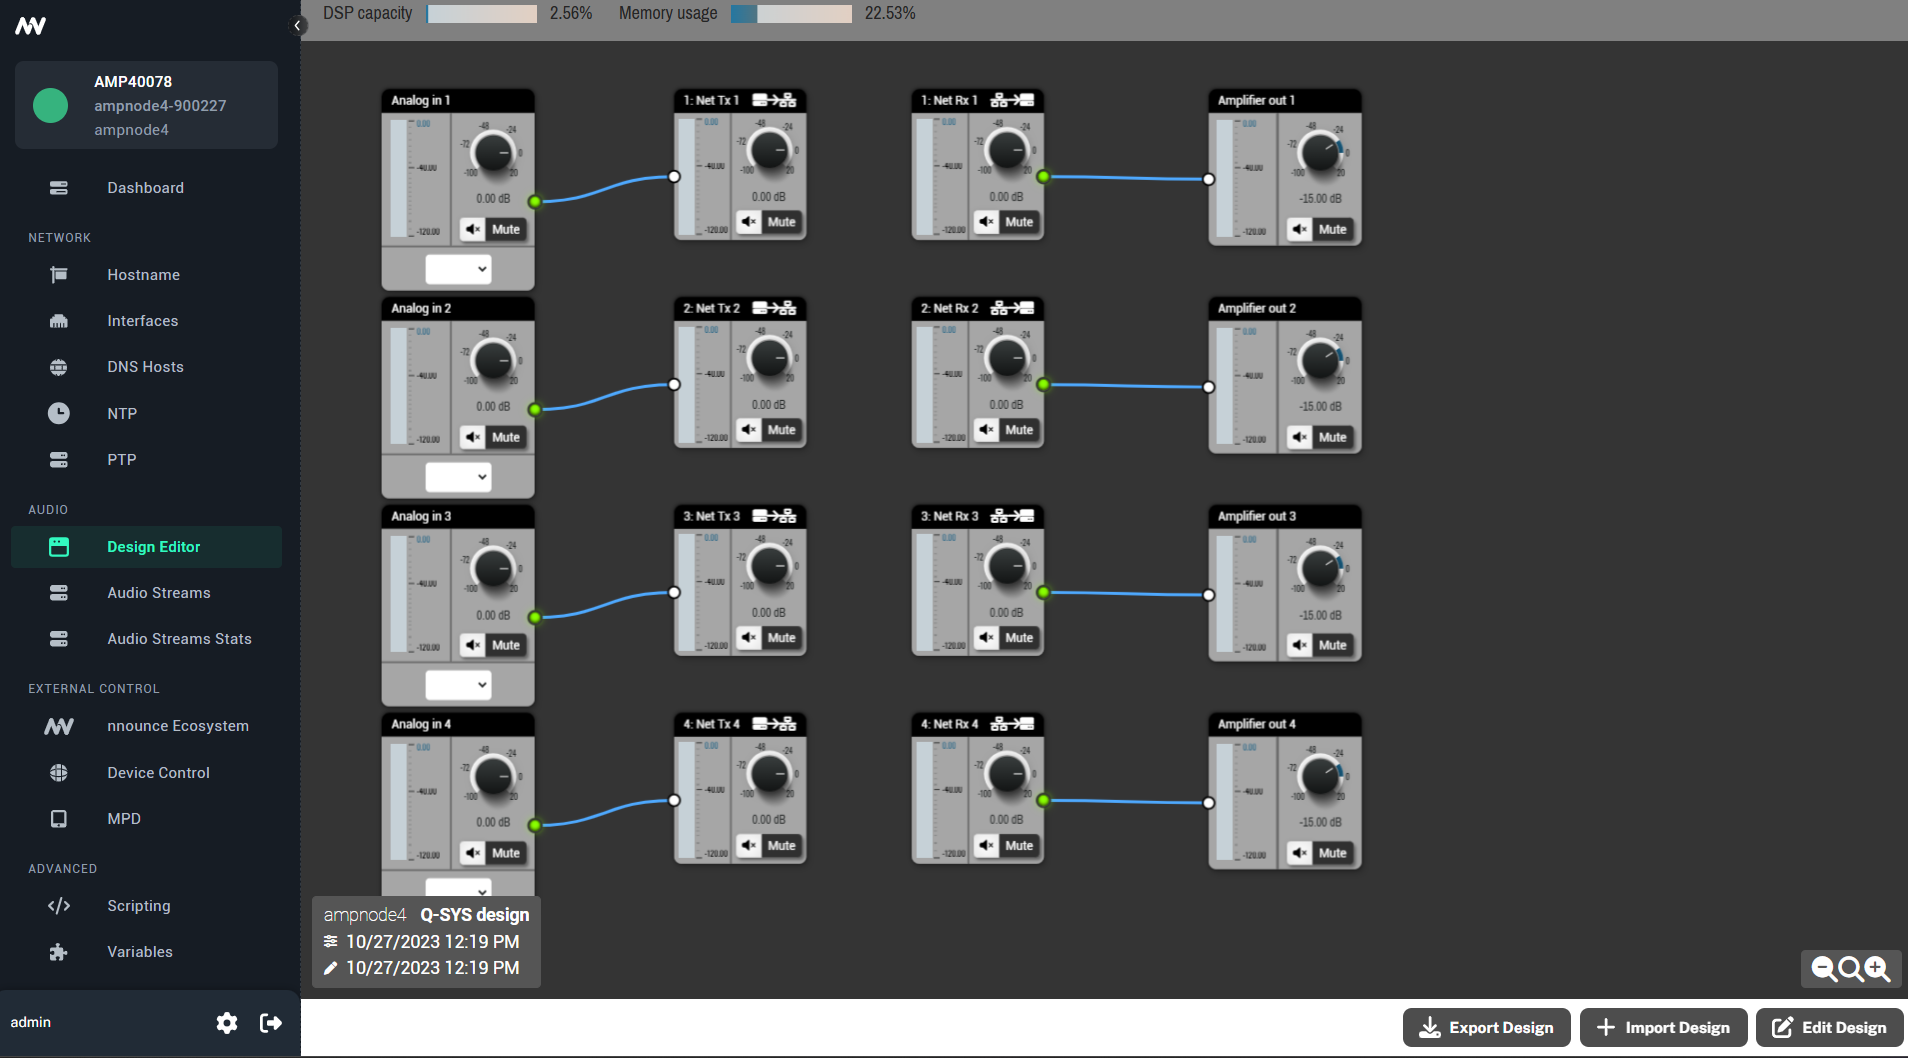
The nnounce configuration UI takes over the information from Q-SYS. In the Basic mode the default design is used in the DSP designer. Manual changes by the user are overwritten with the default design after reconnecting to the WebSocket. The Network Streams section shows the streams as configured in the Q-SYS designer.
IMPORTANT: Do not make any changes in the nnounce configuration UI - DSP designer and Network stream - to avoid malfunction.
Default DSP design:
Option: Advanced Mode
The Advanced mode lets you set up manually your ampnode4 device’s protocols, IP addresses, ports etc. for your streams.
IMPORTANT: When using RTP streams, Q-SYS is limited to 2-channel transmitters. The advanced mode allows you to configure multiple TX components to use all 4 analog inputs/outputs of ampnode4.
1. Open the Streams Configuration section of your ampnode4 plugin.
IMPORTANT: No values are auto filled in.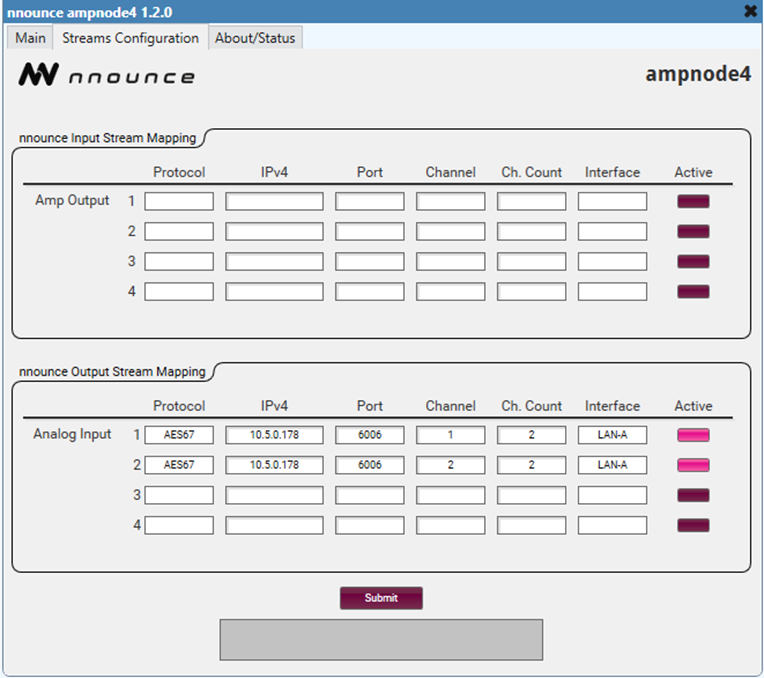
2. Map your stream/s:
Protocol – stream protocol (AES67, RTP),
IP address – fill in the address depending on multicast or unicast stream,
Port – stream port number,
Channel – define the particular channel of the stream,
Ch. Count – sets the total number of channels of the stream,
Interface – define which LAN of the device is used,
Active – activate or deactivate individual streams by simple click on the rectangle.
IMPORTANT: ampnode4 stream configuration needs to correspond to receiver and/or transmitter configuration in your Q-SYS designer.
3. Confirm your configuration with the Submit button.
NOTE: The field below the Submit button will show the progress and validation messages in case of any connection errors.
The DSP designer in the nnounce configuration UI takes over the design from Q-SYS only unless no custom design is created by the user. The Network Streams section shows the streams as configured in the Q-SYS designer.
NOTE: Please do all network stream changes in the Q-SYS designer to avoid any misalignments.
TX stream – transmits audio to other devices, output.
RX stream – receives audio from other devices, input.
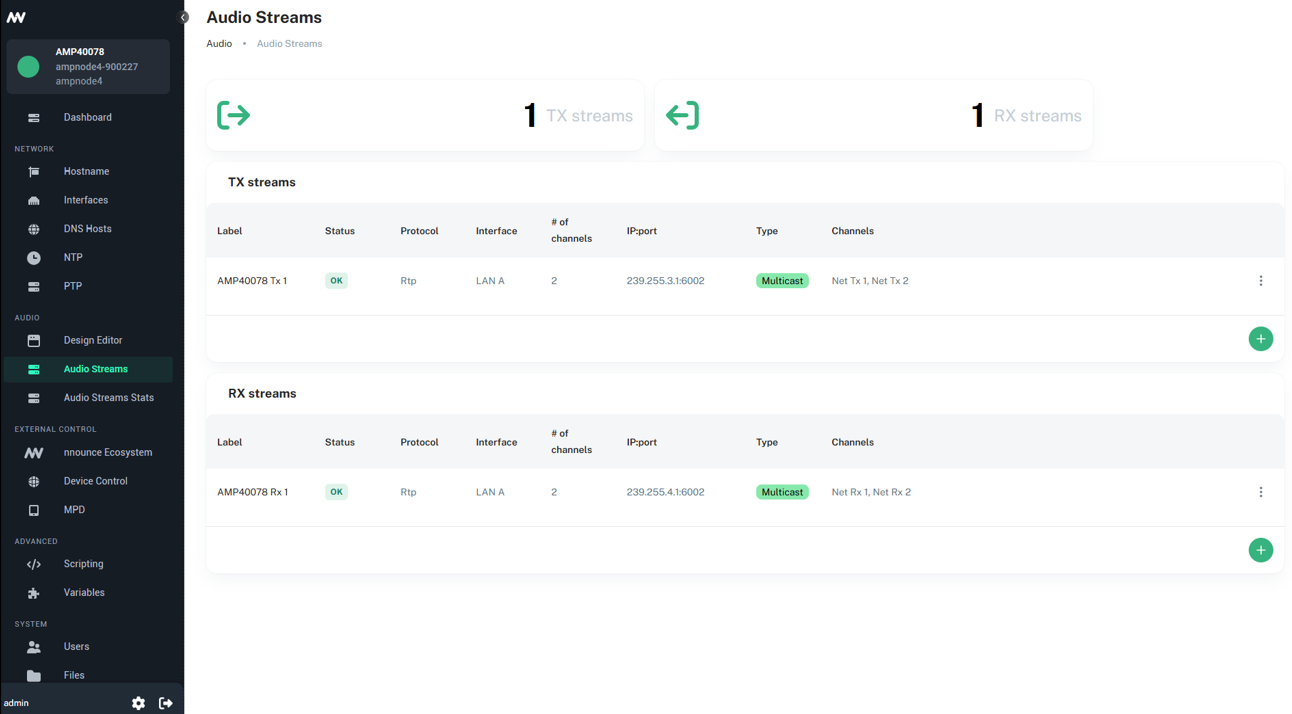
Example of network stream configuration in nnounce configuration UI:
