Features
- 12 Dec 2025
- 1 Minute to read
- Print
- Download PDF
Features
- Updated on 12 Dec 2025
- 1 Minute to read
- Print
- Download PDF
Article summary
Did you find this summary helpful?
Thank you for your feedback!
Description
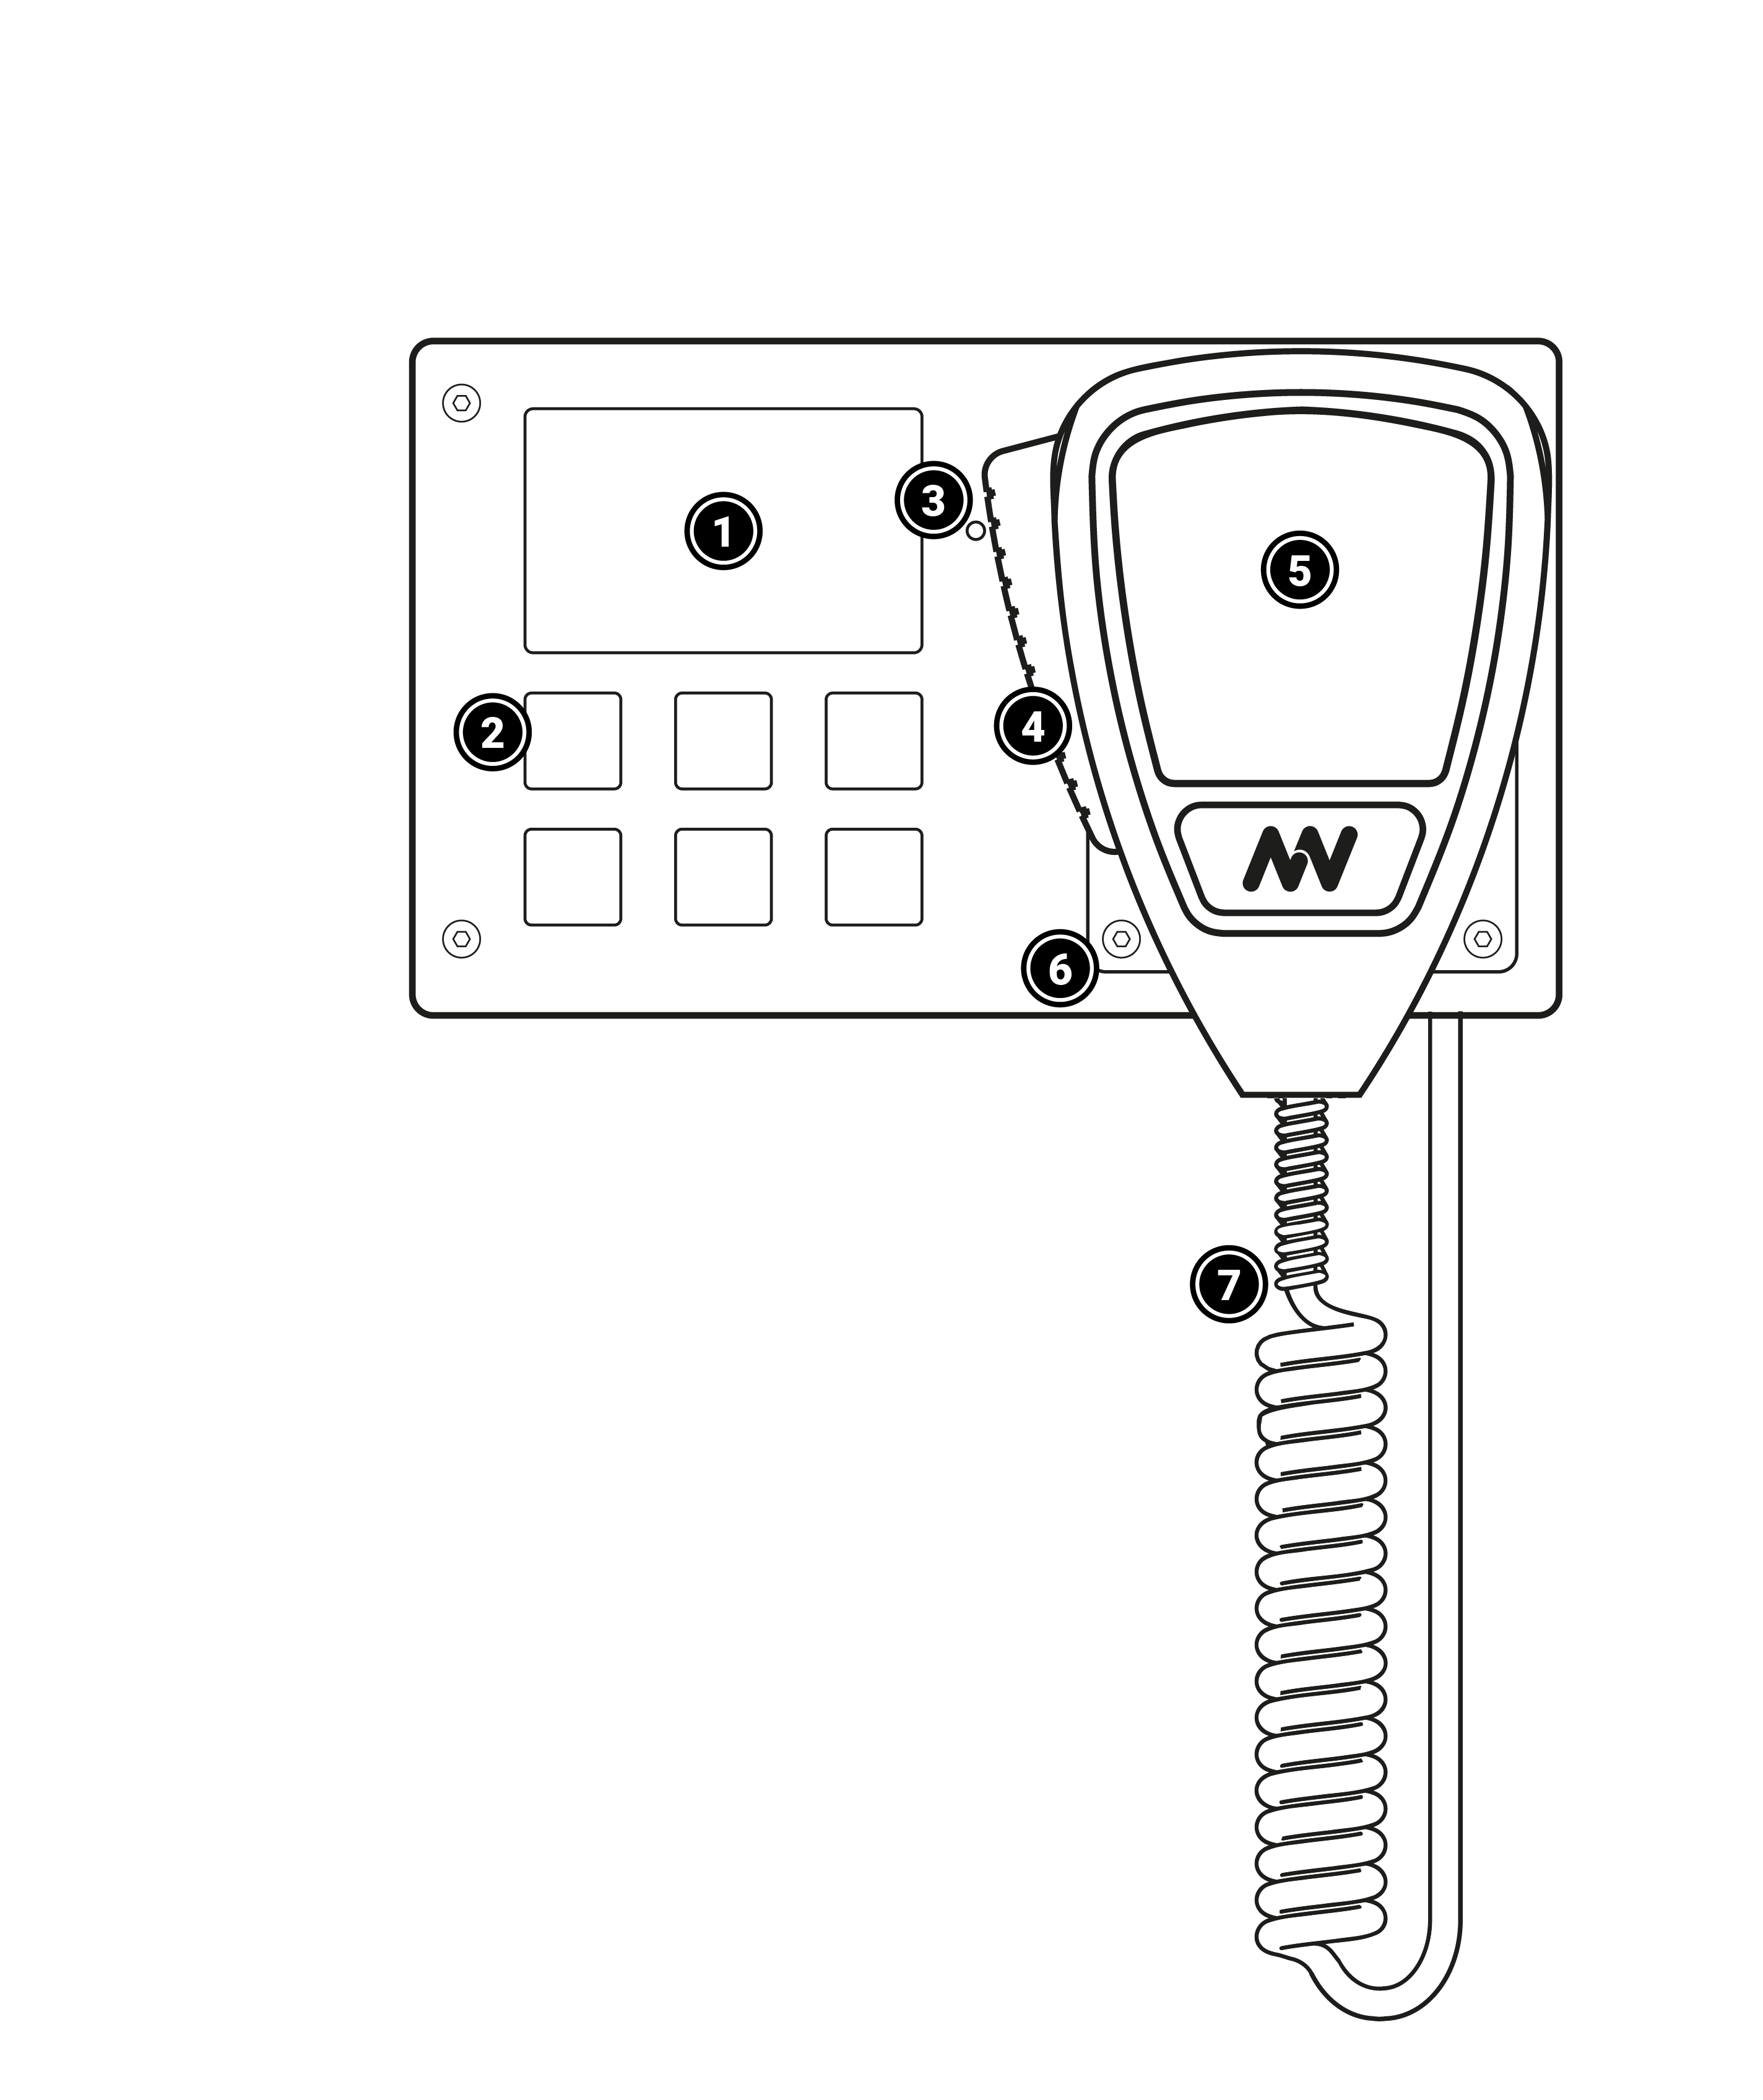
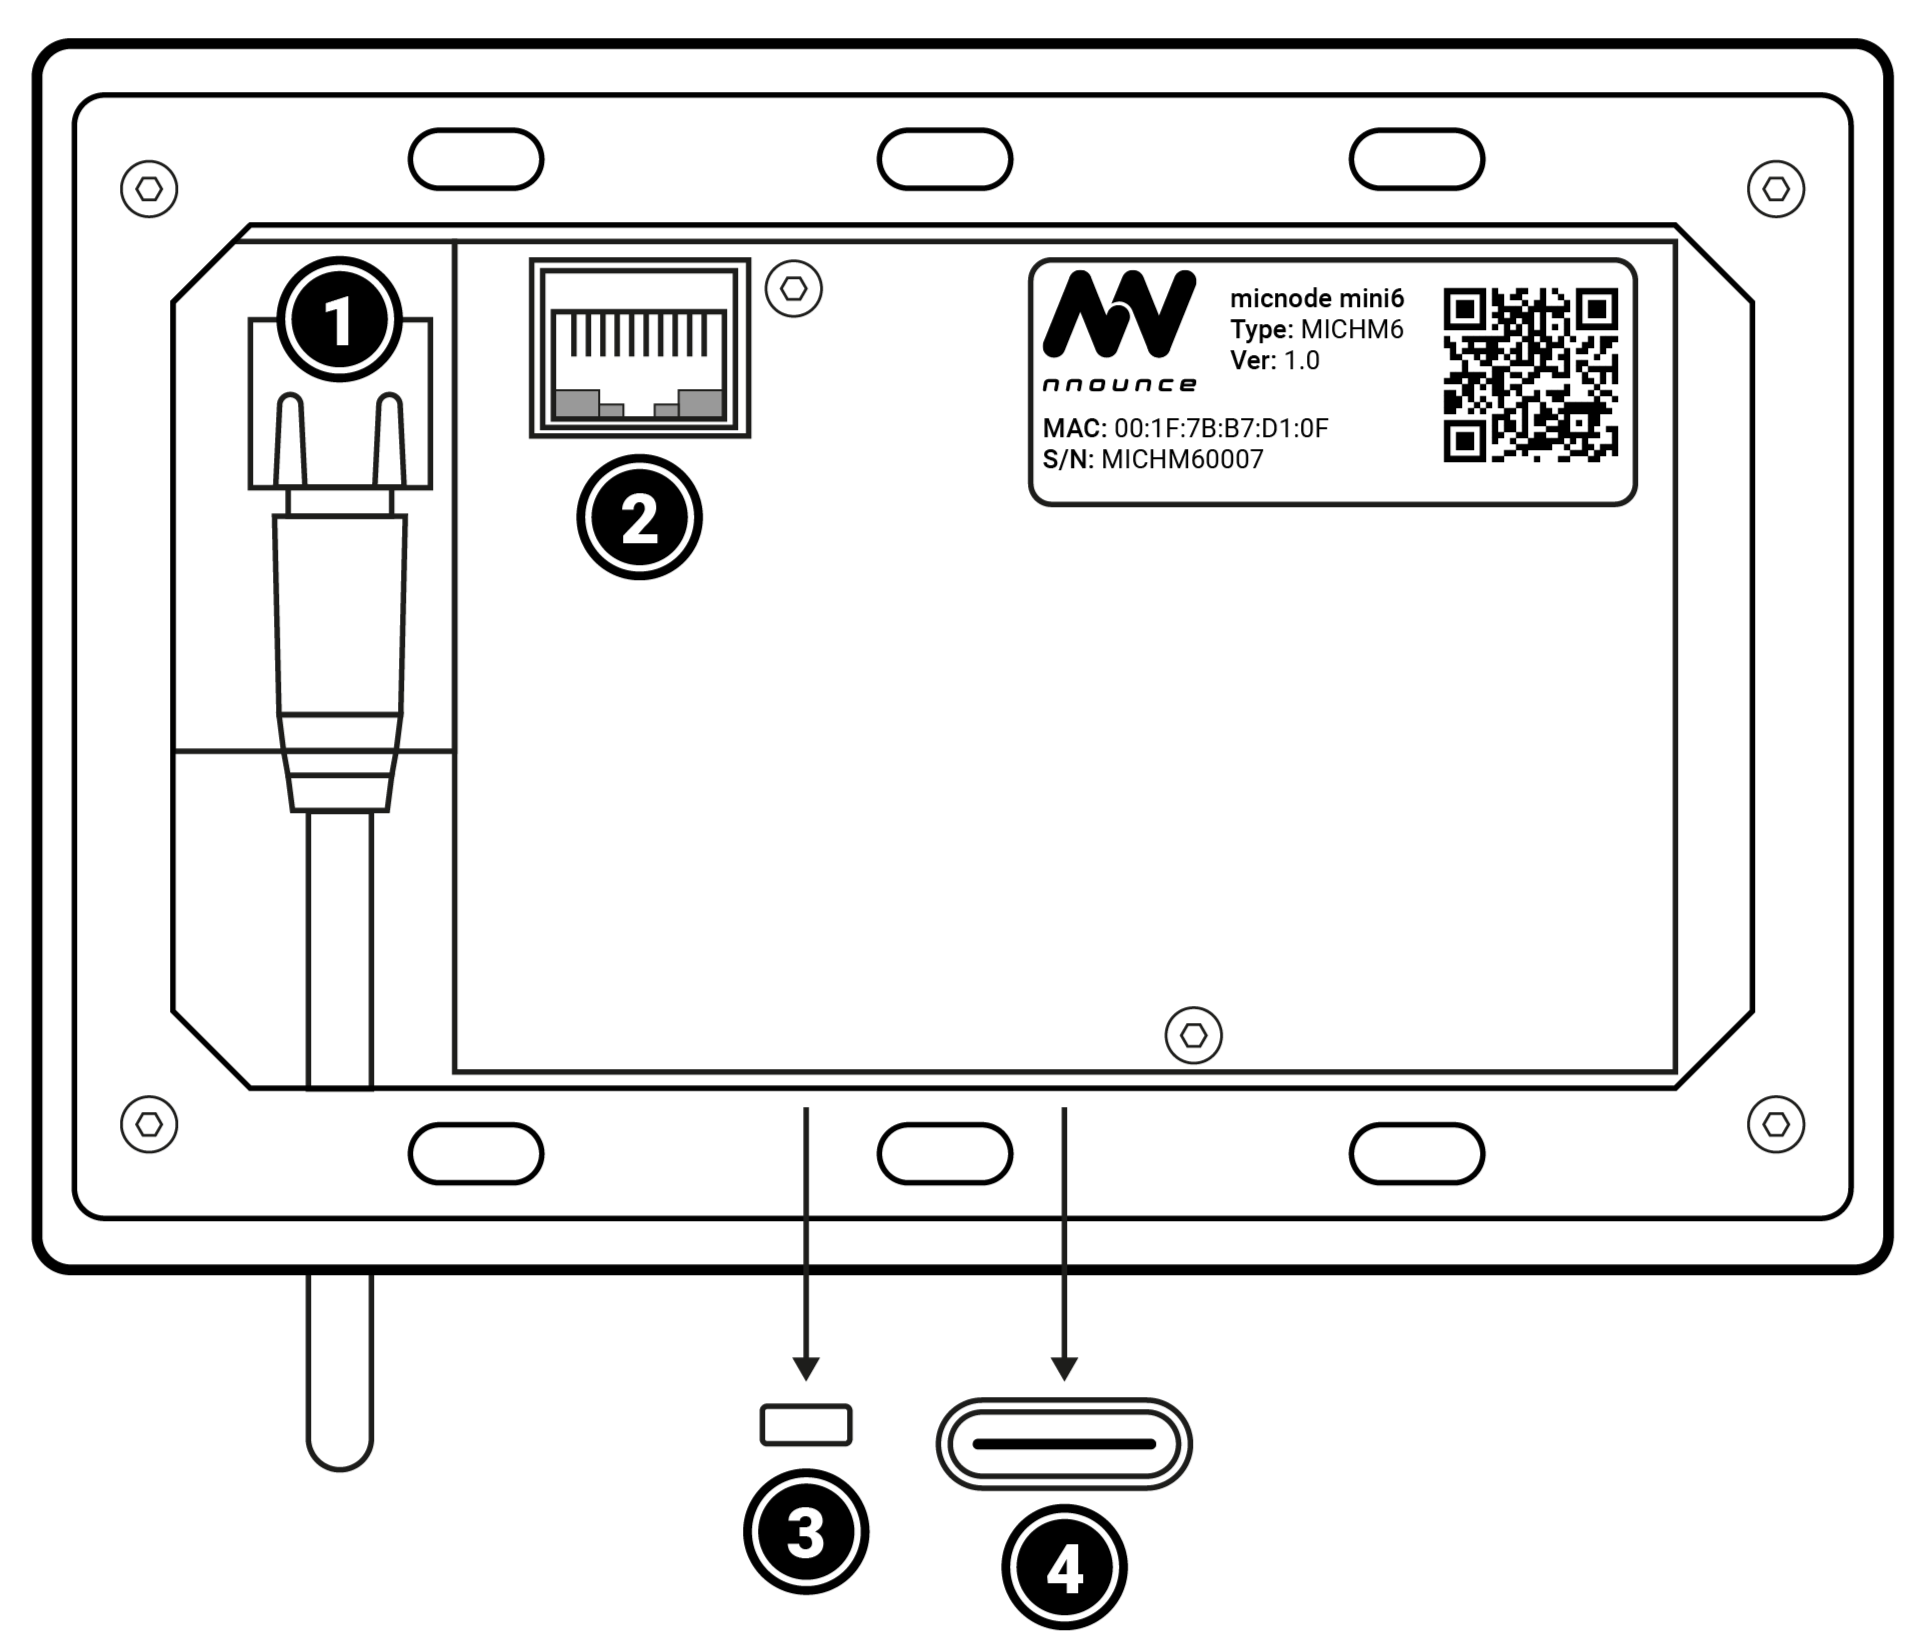
Front and rear panel of the micnode mini6 microphone station.
A. Front panel
|
|
Magnetic Microphone Docking Plate The micnode mini6 microphone station features a magnetic docking plate to hold the hand-held microphone. Simply place the back of the microphone up against the plate and let go – it will snap into place automatically! | |
B. Rear panel
|
|
Power The LAN cable connects the microphone station to the network, enabling both audio and data exchange. It also provides power through IEEE 802.3af-compliant Power Sourcing Equipment (PSE), commonly known as Power-over-Ethernet (PoE). | |
Was this article helpful?