Features
- 13 Mar 2025
- 1 Minute to read
- Print
- PDF
Features
- Updated on 13 Mar 2025
- 1 Minute to read
- Print
- PDF
Article summary
Did you find this summary helpful?
Thank you for your feedback!
Description
Front and rear panel of the micnode aux microphone station.
A. Front panel
| 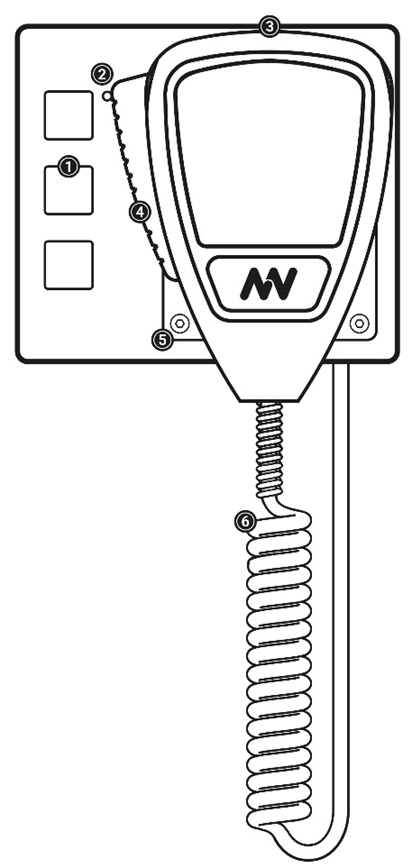 |
Microphone The handheld push-to-talk microphone is available with the handheld microphone station models. This microphone is attached to the microphone station by a magnetic plate. The Talk/Start button is directly on the microphone. Magnetic Microphone Docking Plate The micnode mini microphone station uses a magnetic docking plate to hold the hand-held microphone. Just place the back of the microphone up against the plate and let it go! | |
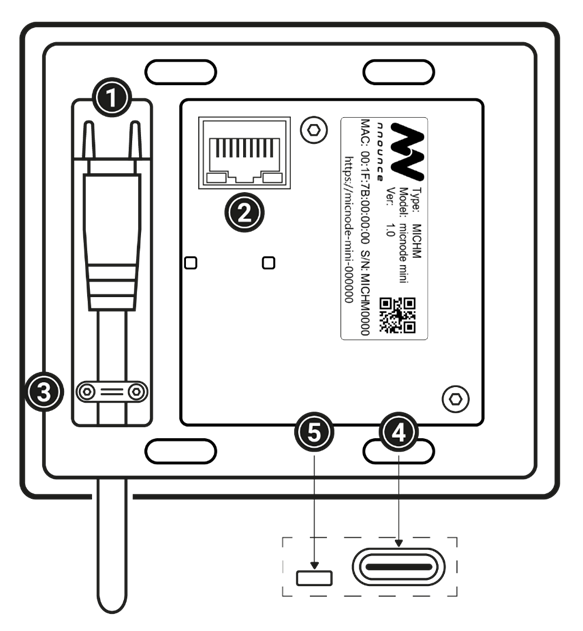
B. Rear panel
|
|
Power The LAN cable connects the microphone station to the network. This enables audio and data exchange as well as receiving power from the LAN network via IEEE 802.3af compliant power sourcing equipment (PSE), also known as Power-over-Ethernet (PoE). | |
Was this article helpful?