Description
The six buttons on the micnode mini3 microphone station can be configured as:
• Zone button for paging purposes can be assigned to a button
• Action button can be defined for a button
• Inactive button which can stay without configuration.
Important
Buttons are numbered from top to bottom on the device.
By default all buttons are defined as zone buttons. To change the button type, navigate to plugin Properties when disconnected and change the button type.
TIP: See Properties configuration in previous tutorial – Button 1 to 3.
Zone Buttons
1. Select Save to core & Run. Then open the micnode mini3 plugin details.
2. Define the zone for the zone button by clicking into the respective Zone or Tag field.
From the list of available zones, select the one to assign to the specific zone paging button.
Example of Button configuration in plugin:
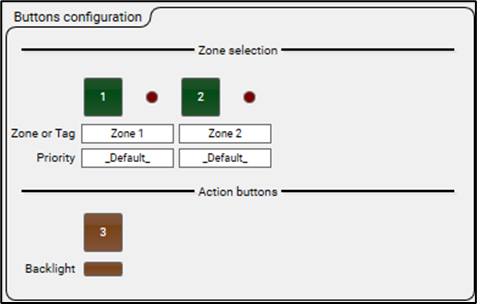
After selection, the zone appears below the zone button number.
Action Buttons
The action to be performed by an action button can be defined in a control script component that is added to the Q-SYS Design. The script defines the action and the number of the action button, as well as the behaviour of the button backlight.