Description
To use the built-in paging dashboard of the micnode2 microphone station, configure zones in the Q-SYS designer micnode2 plugin.
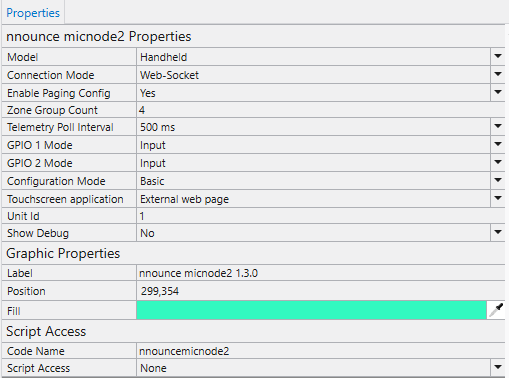
- Go to micnode2 plugin Properties. Make sure the design is disconnected.
- Set the Enable Paging config value to “Yes”.
- Define the desired number of Zone Group Count:
- Save to core & Run your design and the open the micnode2 plugin.
- Configure zone buttons in the plugin window in the Buttons configuration part:
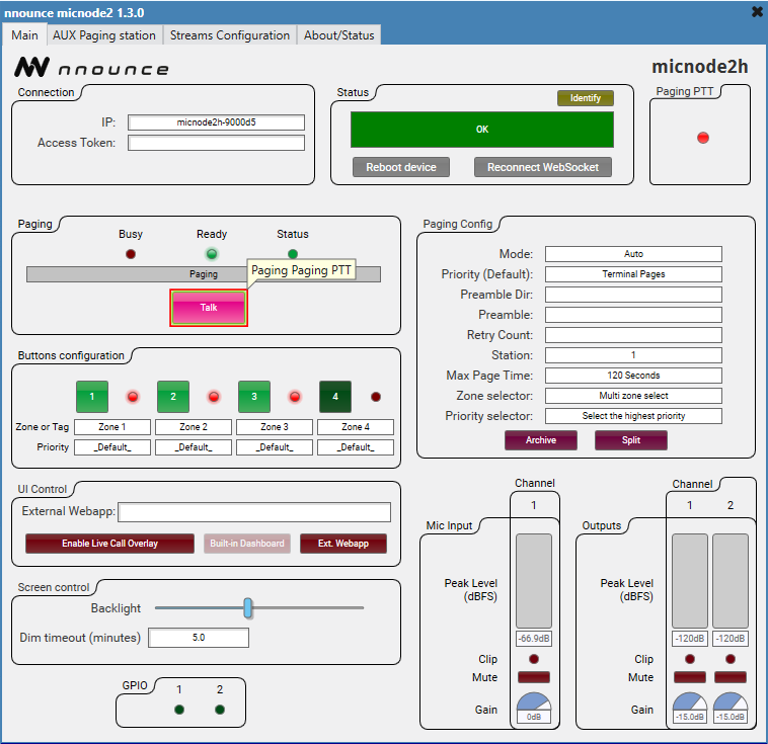 Zones are now ready to use in micnode2 microphone station.
Announcement Triggering
Once the network settings and configuration including zones are set in Q-SYS designer, paging can be triggered with the Talk/Start button.
IMPORTANT: Which mode - Live, Delay or combination - is used depends on Paging configuration of your micnode2 device in Q-SYS designer.
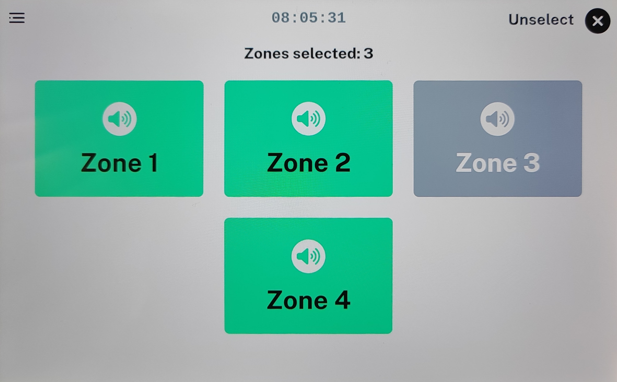
A. Select zone/s:
|
|
B. Talk/Start button Press the Talk/Start button on the microphone side. | |