Using individual table cells in templates
- 27 Sep 2023
- 2 Minutes to read
- Print
- Download PDF
Using individual table cells in templates
- Updated on 27 Sep 2023
- 2 Minutes to read
- Print
- Download PDF
Article summary
Did you find this summary helpful?
Thank you for your feedback!
In this tutorial we will show you how to add data of individual table cells defined in the Tables tab to your templates.
Note: It is not necessary to have a data source linked with your table for this task.
Topics covered:
- Templates tab
- Text from tables
- Image from tables
- Tables tab
- Data source editor
Sample screen: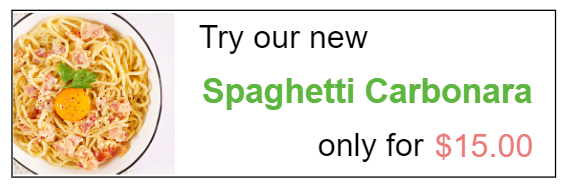
TUTORIAL STEPS:
A) Create a table on the Tables tab - see how to do this in the previous Create and manage your tables tutorial. | |
B) Create a template
| .JPG) |
C) Add text from table
| .JPG) |
D) Tables sub-window
| .JPG) |
E) Configure how you want to acquire data from the table. After the table has been selected, it is required to specify the way the data is pulled from it into the text from table element. To achieve a result as in our example:
| .JPG) Explanation of Variable selector, which you can set to Manual or Data Source:
|
F) Add image from table
| .JPG) |
G) Configure how you want to acquire data from the table.
| .JPG) |
H) Further design ideas for your content:
| .JPG) |
| I) Click the Save & Publish button in the lower right-hand corner when your template is final. Now it is ready to be assigned and shown on your display as a standalone feature or used as part of your food menu template. | .JPG) |
Was this article helpful?